 Authorization Field, Object Class & Authorization Object Creation & Use
Authorization Object checks the particular activity( may be create, change, display,delete, etc ) assigned to a user for a particular business process. The post shows how to create an authorization object for 3 different business processes with different activities.
To create and make use of it the below steps to be performed-
- Creating authorization field- Tx- SU20
- Creating Object class- Tx- SU21
- Creating Authorization object which contains authorization fields under object class- Tx- SU21
- Creating a Role- Tx- PFCG
- Assigning Authorization Object to the role and generating profile
- Assigning role to the Business user
- Using Authority-check on authorization object in the program
The post shows using authorization object in 3 different business process with different activity.
Tx- SE11 and create a data element and domain.

Provide 3 different domain values for three different business processes. Save & activate the domain & data element.

For the different activity standard already provides a data element & domain and domain value table where different activity are already provided. Huts check this in Tx- SE11 .

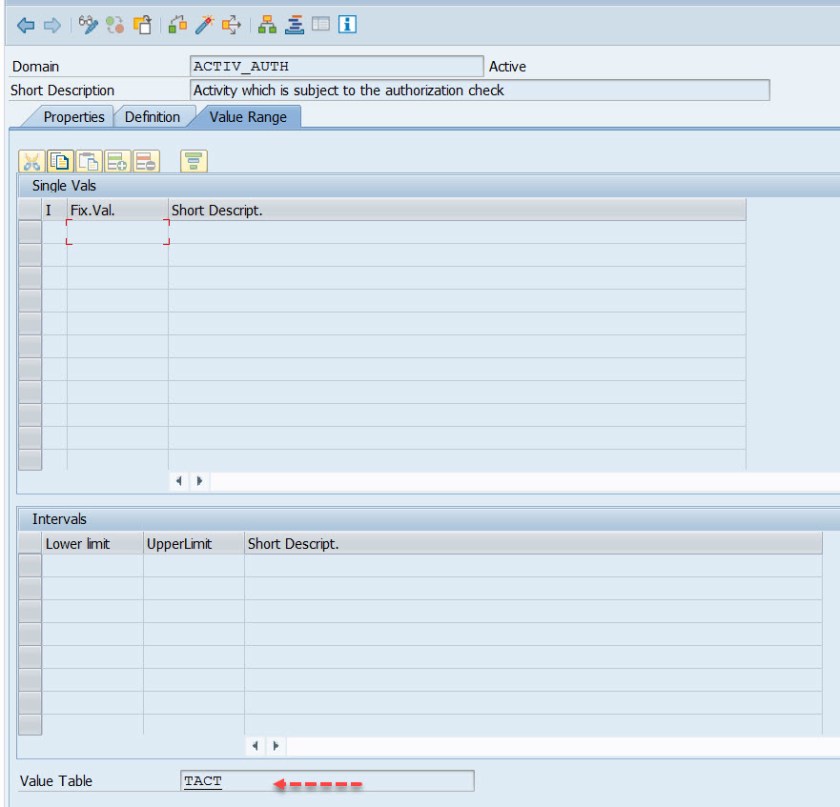

Values maintained for the ACTVT field.

Well, up to this point we created a data element with domain having 3 fixed values for 3 different scenarios and already sap provides one data element ACTIV_AUTH for the activity purpose. Next step is to create authorization field.
Execute Tx- SU20.

Look for the field – ACTVT and double click on it.
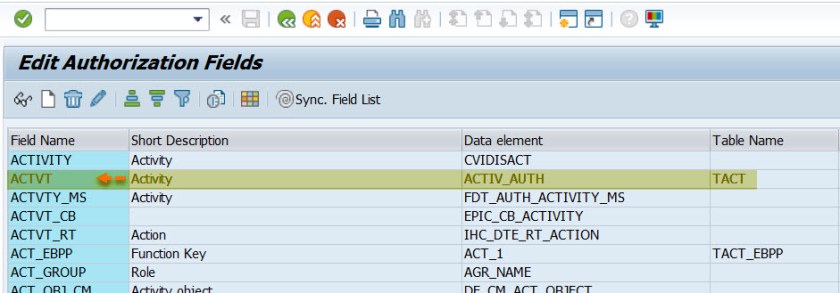
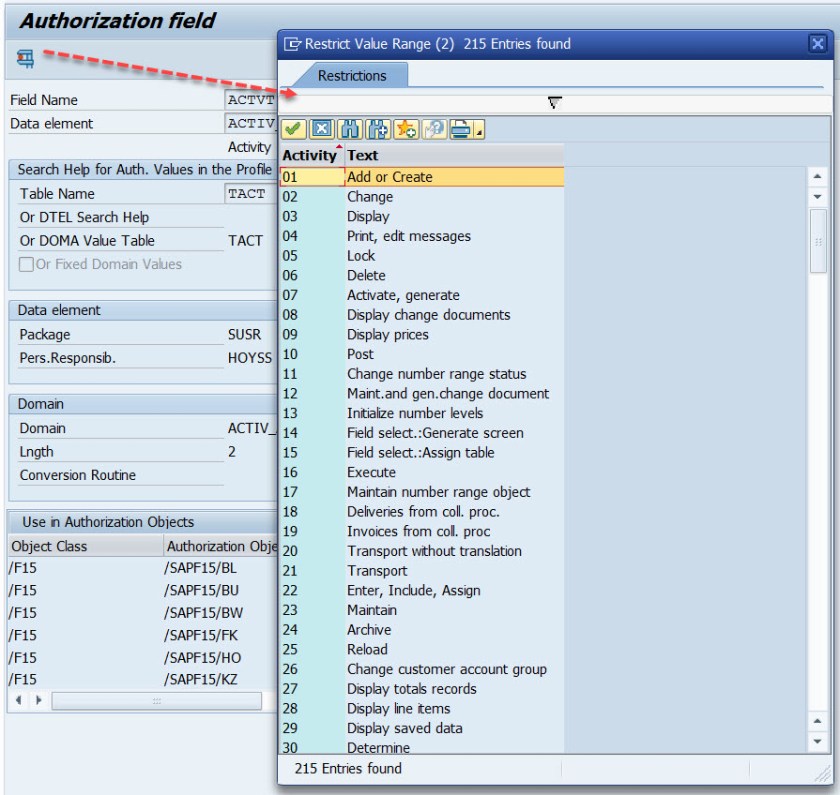
Well it refers to the table TACT for the values. Execute it.

Here are the values.
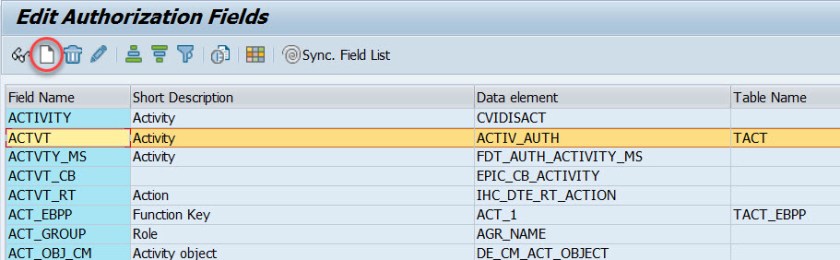
So one of the authorization field – ACTVT for the different activity purpose is already available. Now we have to create one more authorization field for the different business purpose. Select the Create button.
The below screen appears.
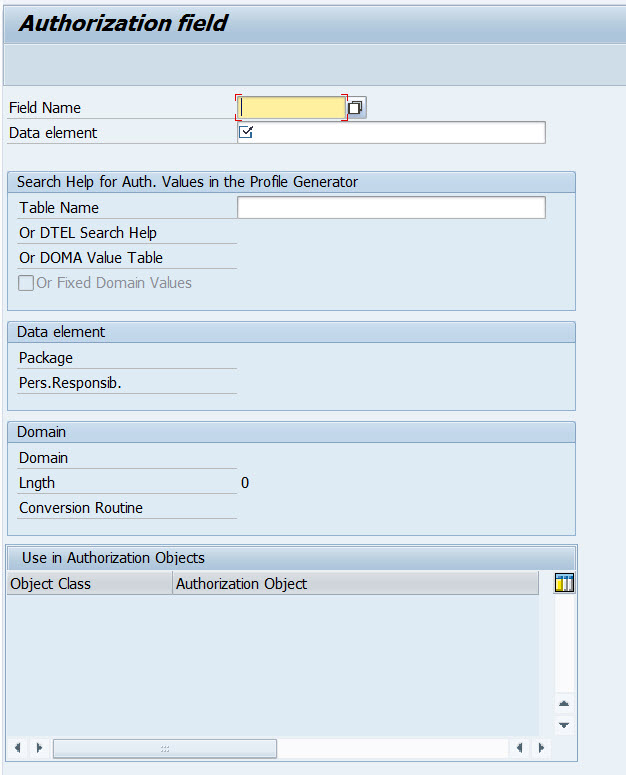
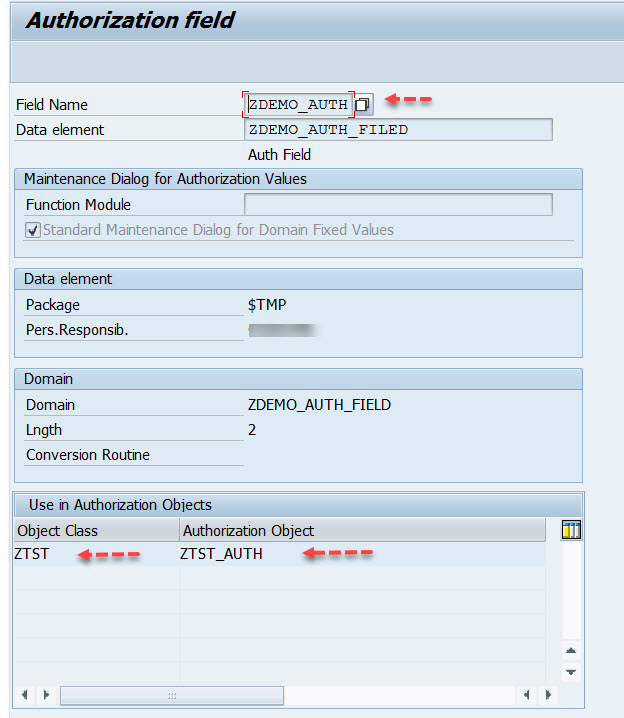
Provide the Filed name and provide the already created data element and press Enter key.

The values would be taken from the domain fixed values you can see from under the Maintenance Dialog for Authorization Values. Save and go back. Here currently this authorization field is not used in any authorization object. So the section is blank now.

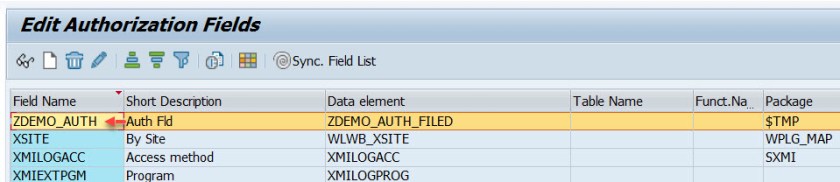
Well we have two authorization fields- 1. ZDEMO_AUTH and 2. ACTVT fields are available.
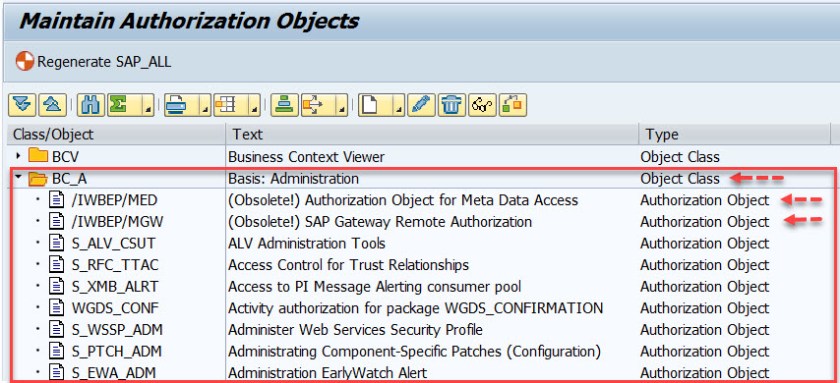
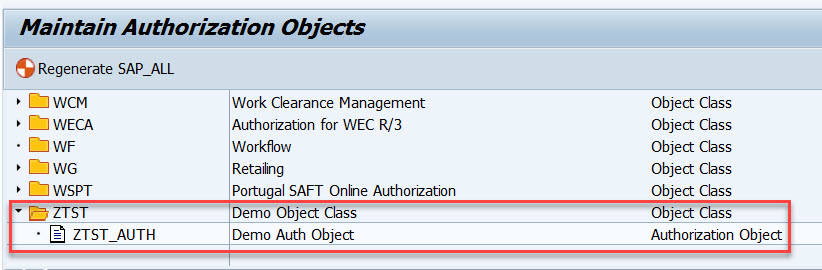
Next step is to create Object class and authorization object inside object class.
Go to Tx- SU21.

If you see any object class, it can contain many authorization objects.
From Create button, first select object Class.

The below screen appears.
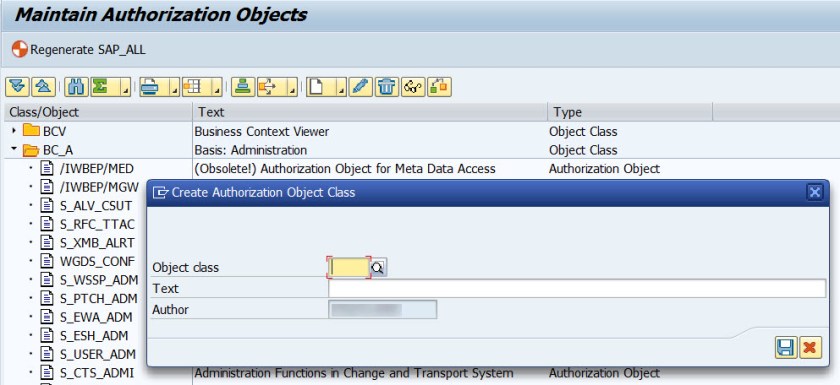
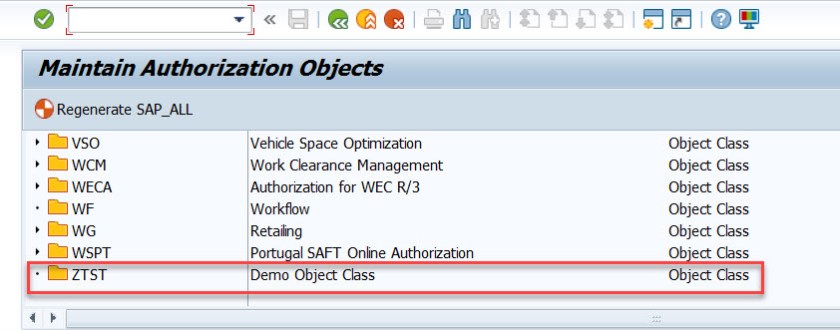
Provide a object class name & description and Save.
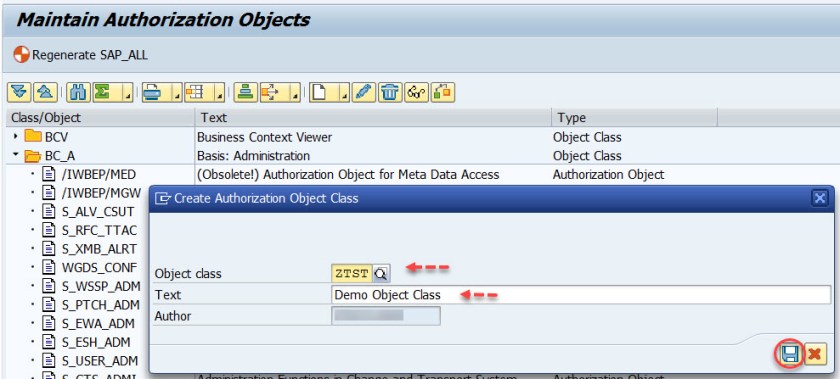
Creation of object class is over.
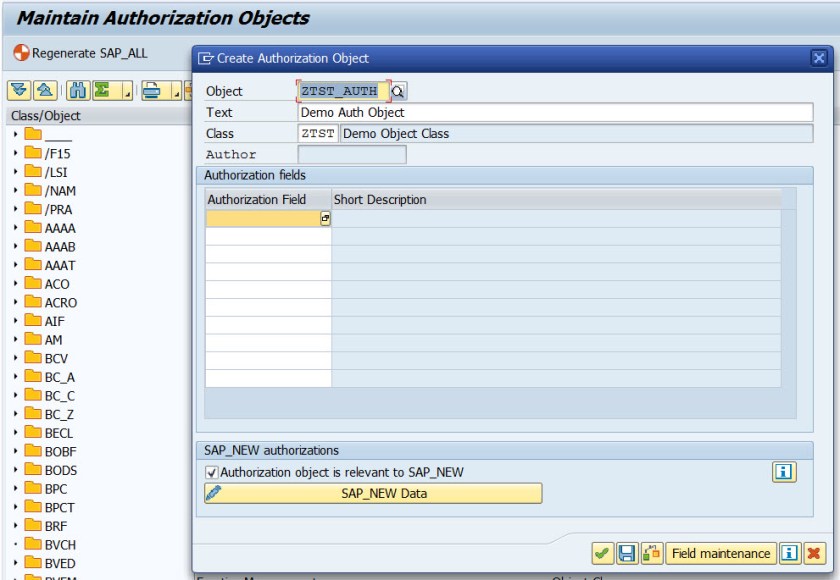
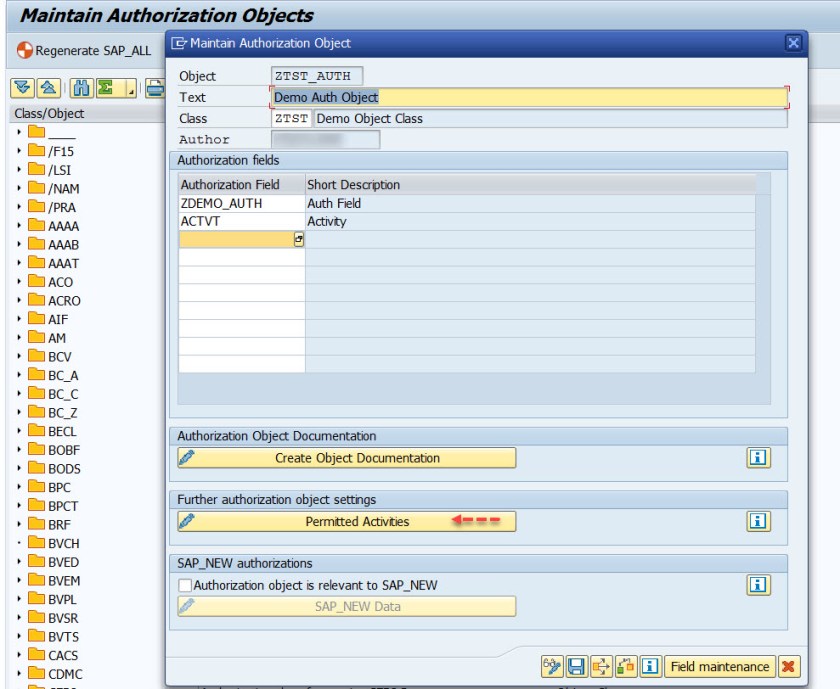
Now let’s create authorization object.

The below screen appears.
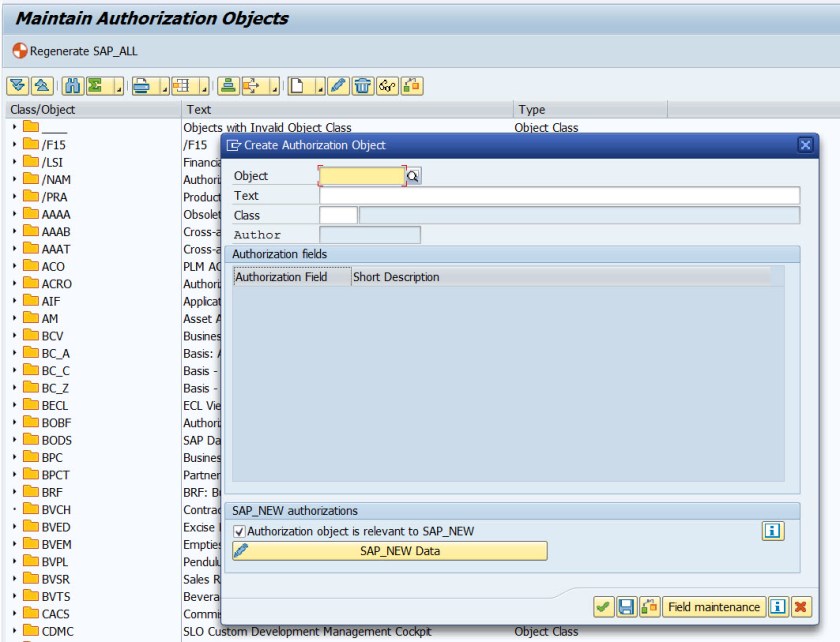
Provide the object name, description and already created class name and select Continue button.
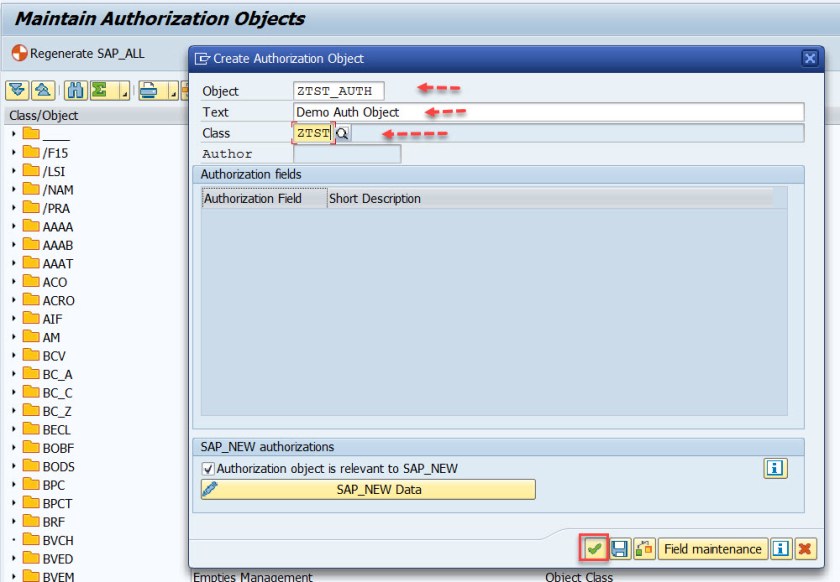
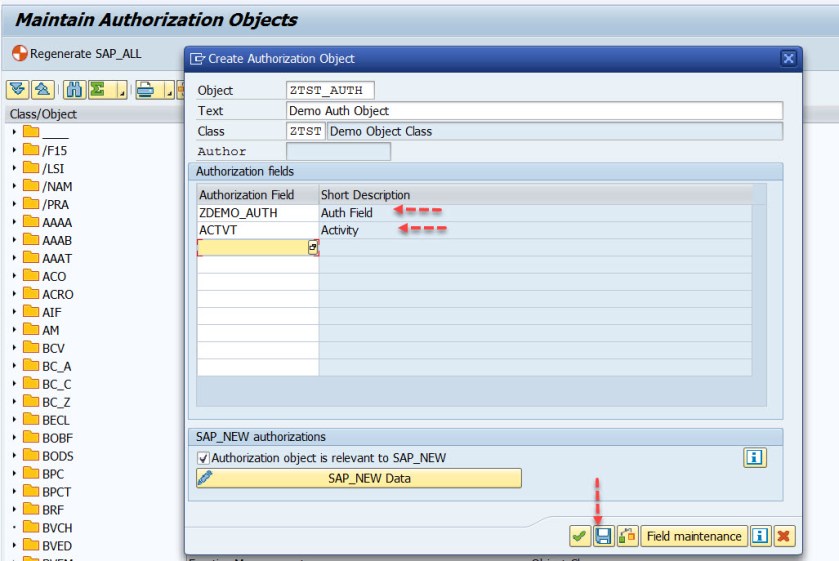
Now the authorization field section is editable.
Add the two authorization fields and select Save button.
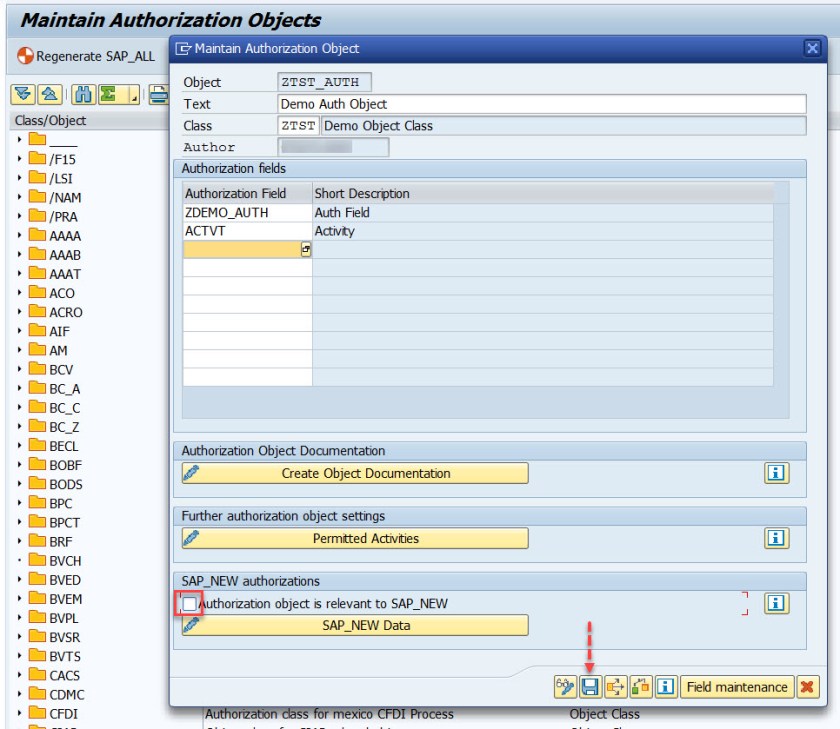
Remove the SAP New Authorizations and save.
Click on Continue.
Select button Permitted Activities button.
The below screen appears.
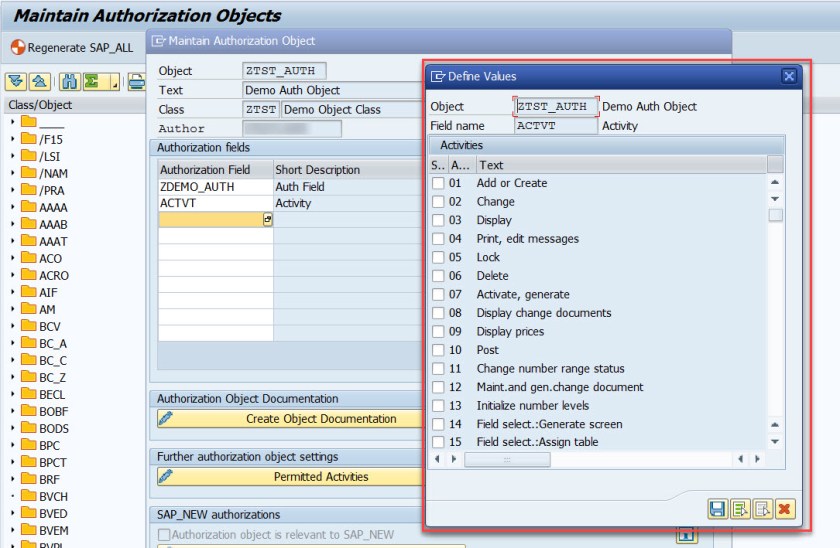
You can select as many activities and click on save. For demo we want to just check the Display authorization. [ As we select Permitted activities, it only allows to set the values for the ACTVT field, for other field we can set the value during the authorization object assign to the role ]
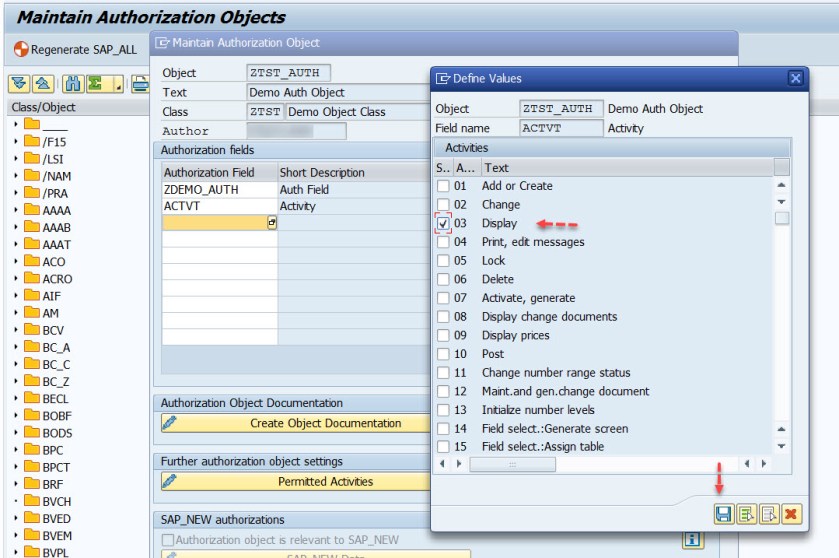
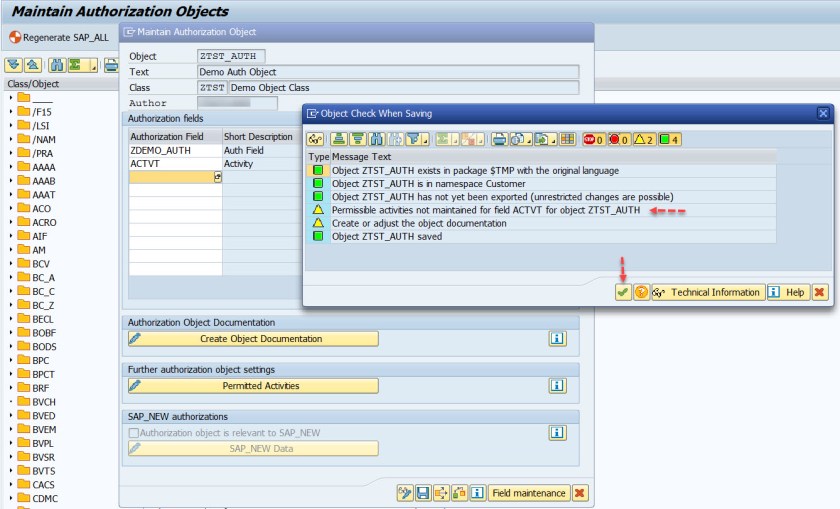
Click on Save.
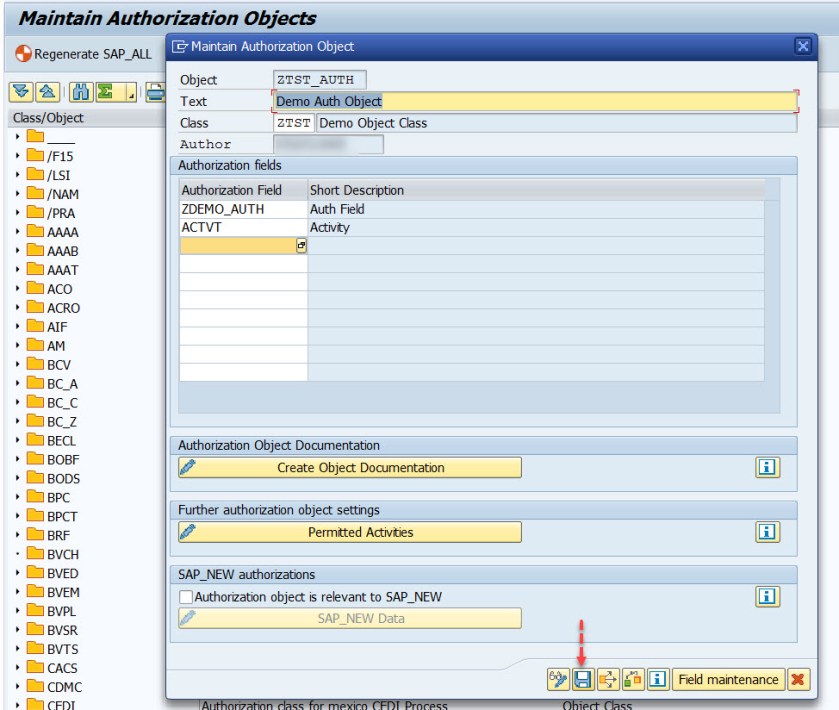
Select Continue.
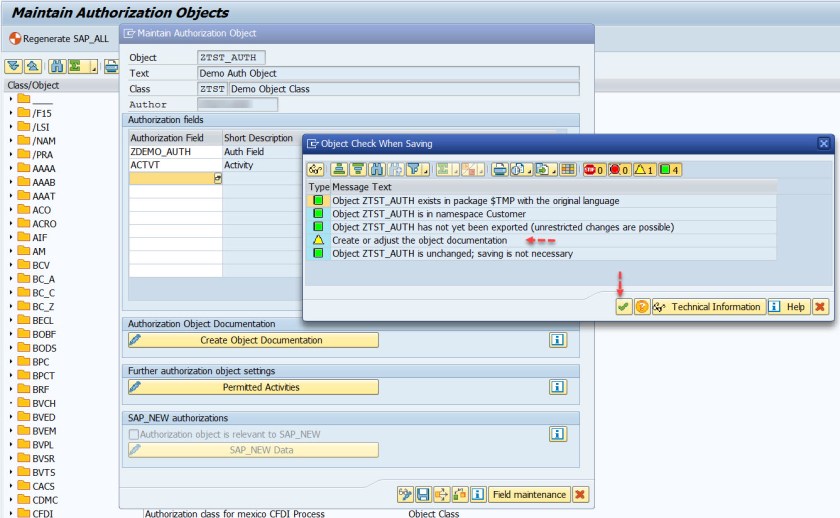
Select the close button.
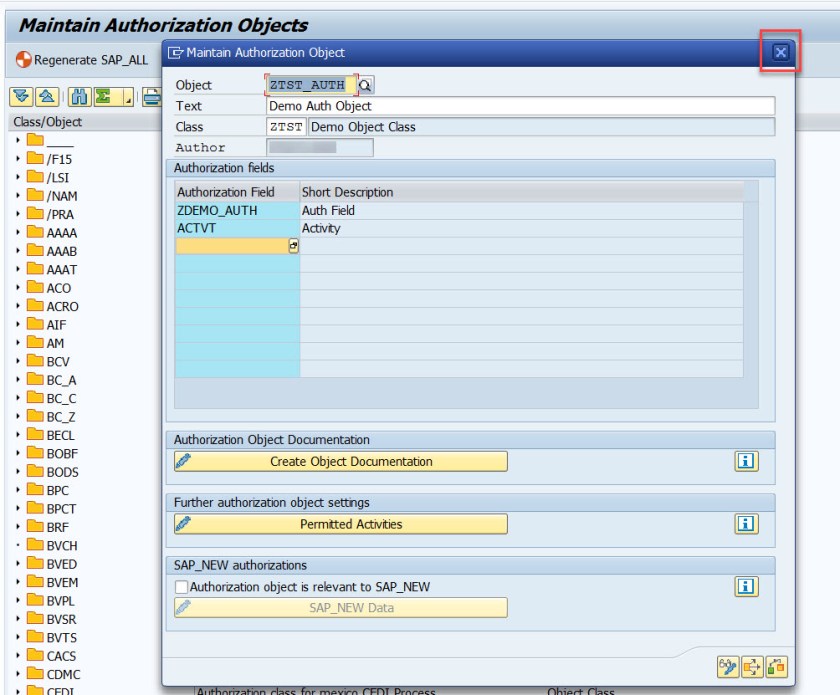
Authorization object creation is over.
If you go to Tx- SU20 and open the authorization field, thr authorization object is assigned to it.
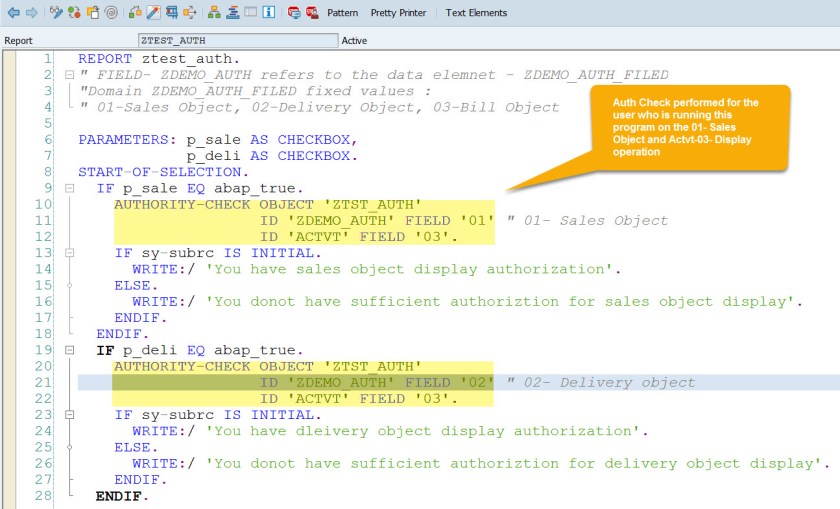
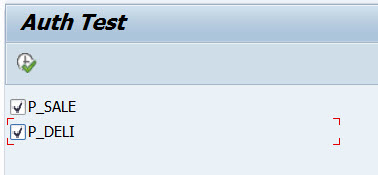
Program that checks authorization object for display activity on the sales object & delivery object.
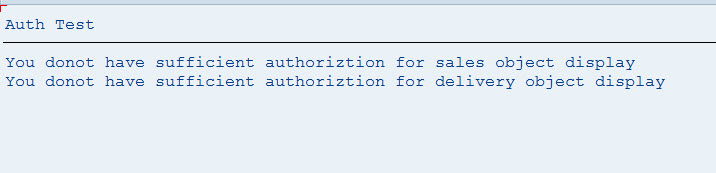
Here the authorization check is failed.
The next step is to create a role in Tx-PFCG and assign the authorization object to the role and generating the profiles and finally assigning the ROLE to the user in Tx- SU01

Hi,
Very detailed explanation, good work,
Please share the next tutorial link to:
“Create a role in Tx-PFCG and assign the authorization object to the role and generating the profiles and finally assigning the ROLE to the user in Tx- SU01”.
Thank you!
LikeLike
Very Detailed and Clear Document which demystifies Authorizations Objects, Authorizations fields etc.
Thanks You!
LikeLike
Great Bloggg 🙂
LikeLike