 CRM Product Modelling and Product Configuration
In CRM, product can be configured to create a configurable product which reduces the complexity of creating multiple products. Below post steps describes how to create a Service (product) and configure it.
Create a service and the screen appears.
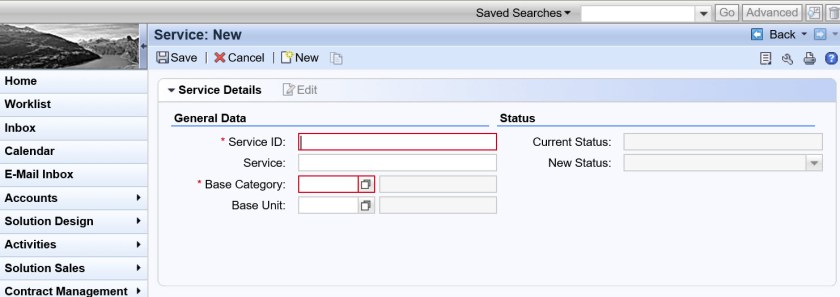
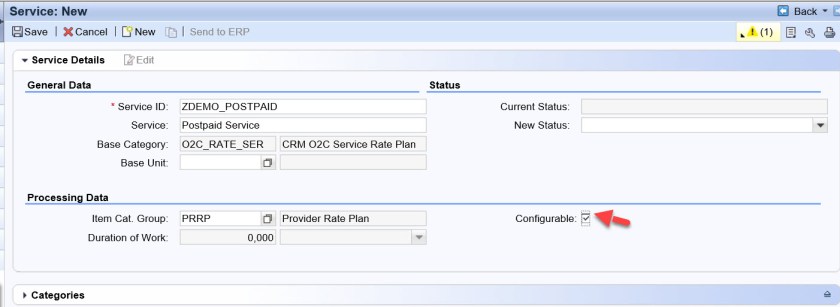
Provide the ID and description, base category and item category group and choose Configurable as YES. Before this the customization must be made to allow configuration for service( check- Allow Configurable Product Modelling )
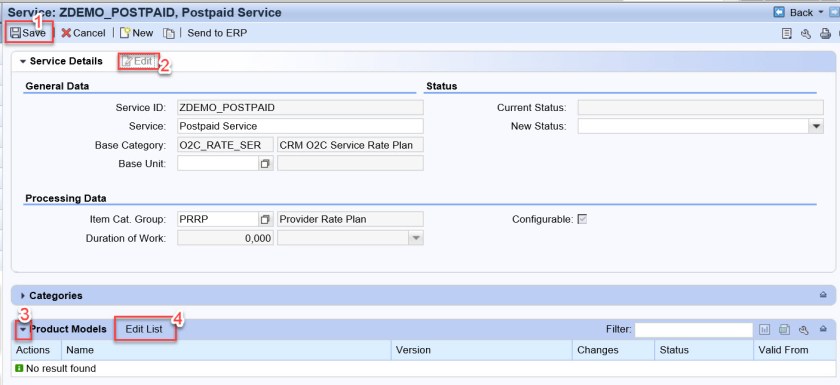
Now Save and Go to Edit mode. There would be block: Product Models, expand and click on ‘Edit list’ to create a product model.
The below screen appears. Choose ‘Insert’.
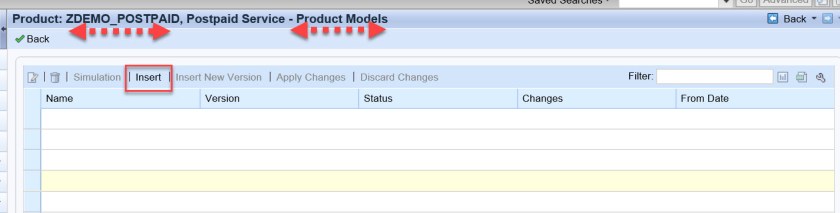
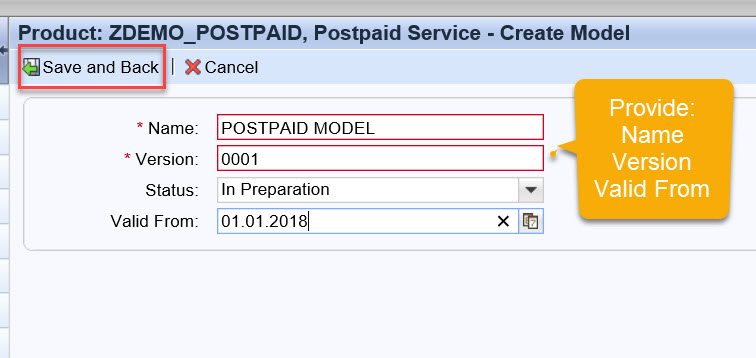
The below screen appears to provide the product model details.
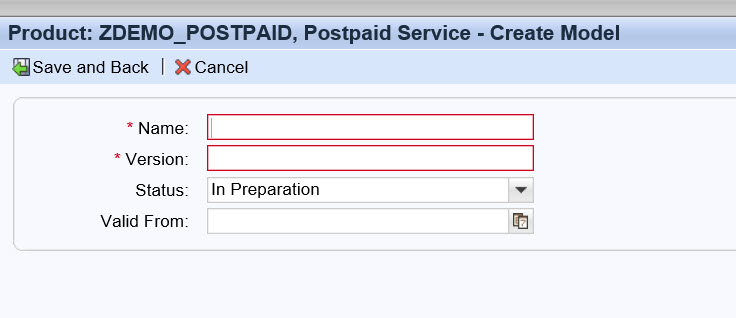
Provide Model Name, version, valid From date and choose Save and Back button.
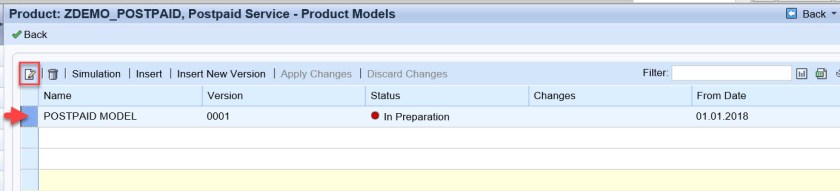
Now select the model and select Edit button.
The below screen appears.
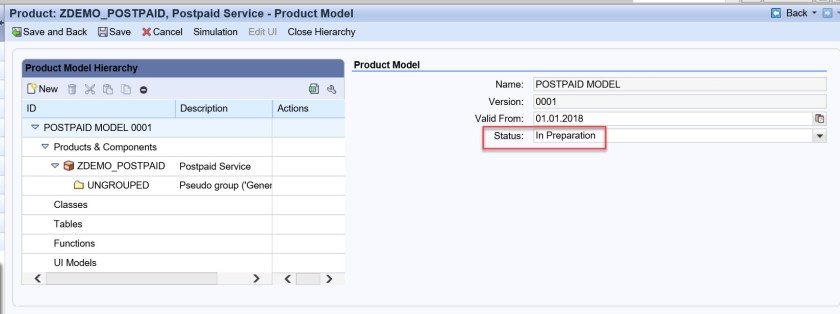
The different characteristics creation and there dependency can be created for the product. But then we can not assign these characteristics to other product.
Instead of that all the characteristics creation and there dependency can be created in a class and later we can add any number of products to this class who wants to inherit the properties.
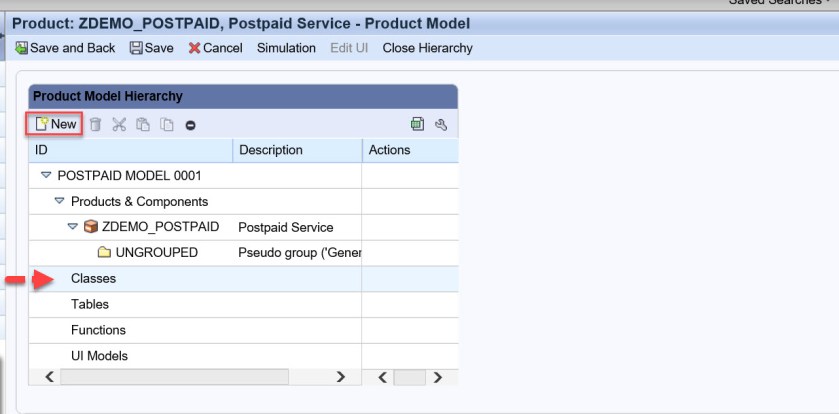
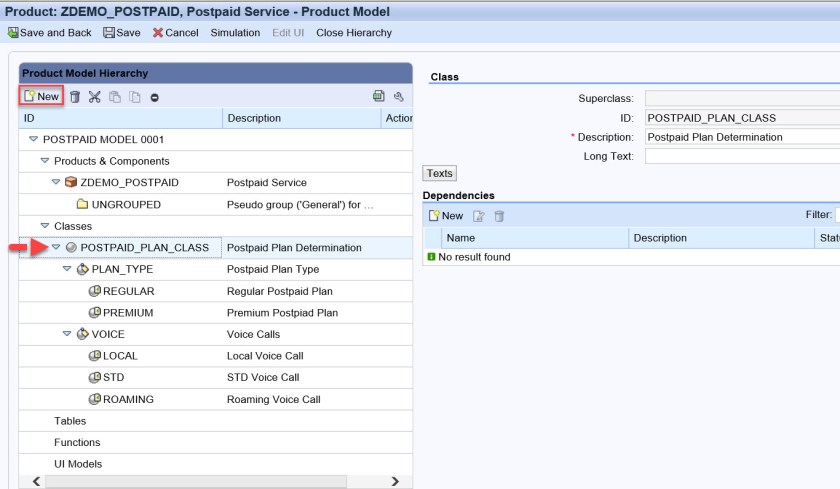
So lets’s define a CLASS first. Select the Class and then Choose ‘New’ button.
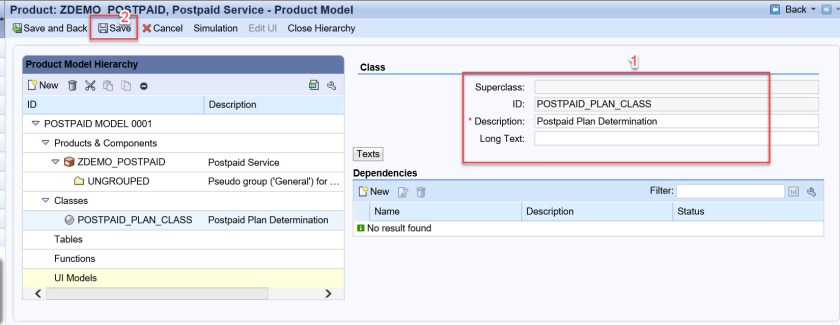
The below screen appers.
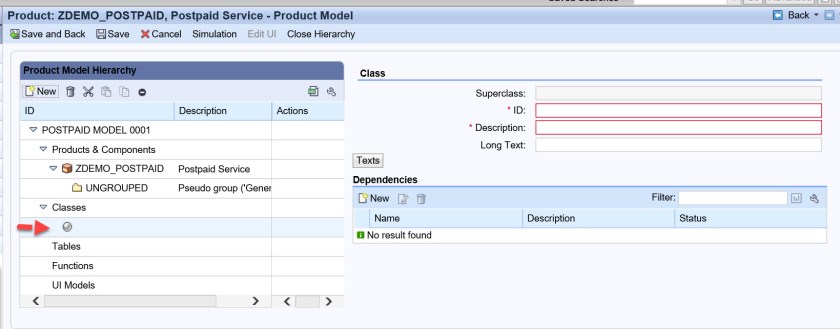
Provide a class name and description and Save it.
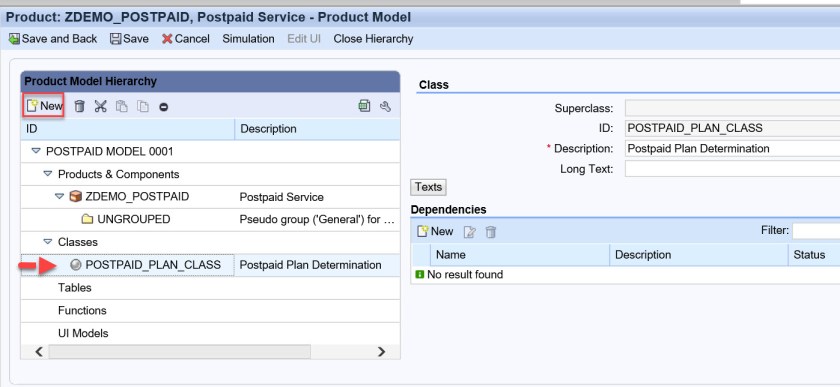
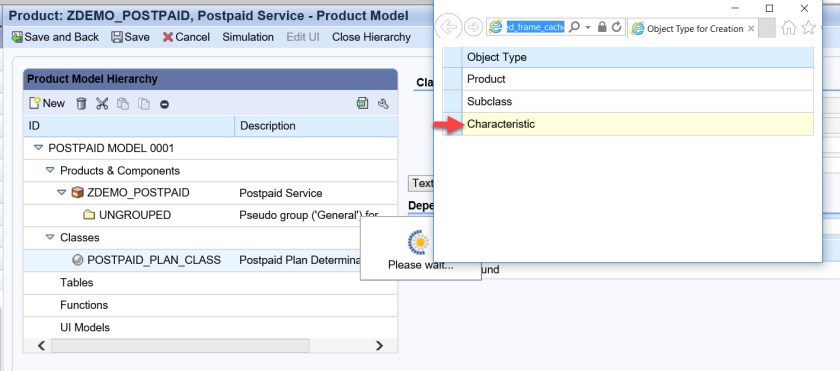
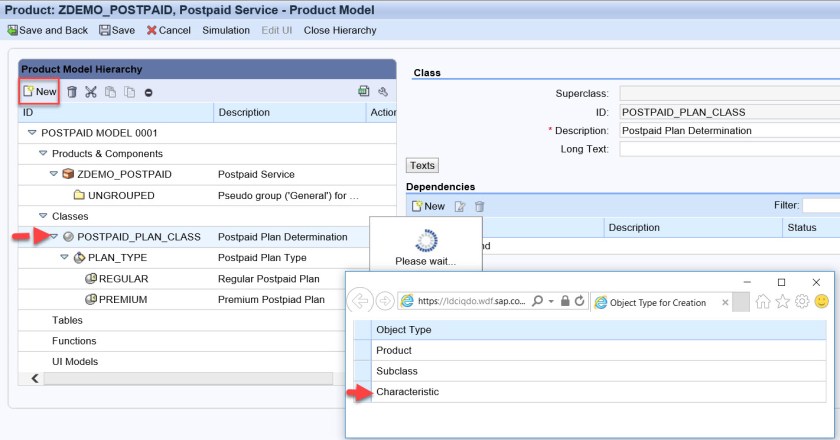
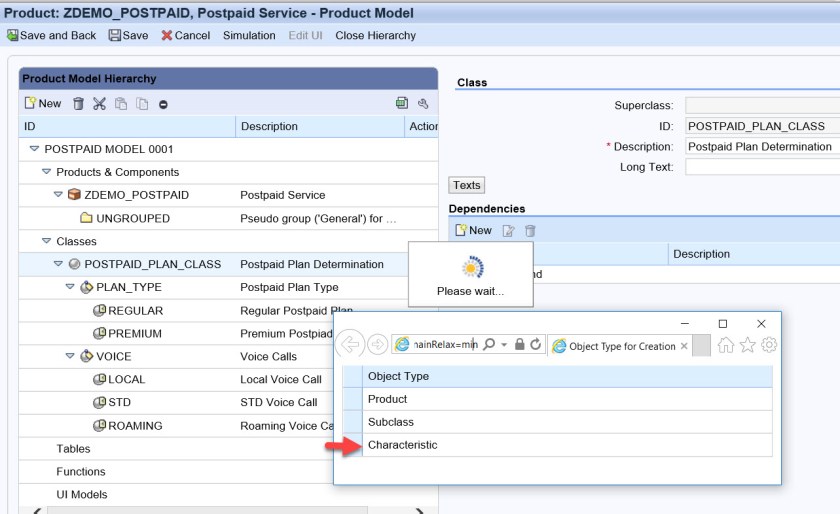
Lets create the first characteristics and under the class. So select the class and choose New and from the appeared screen, Choose Characteristics.
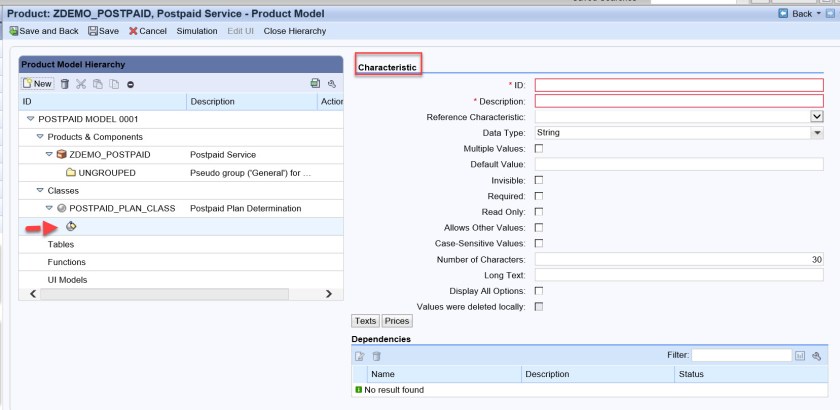
The below screen appears.
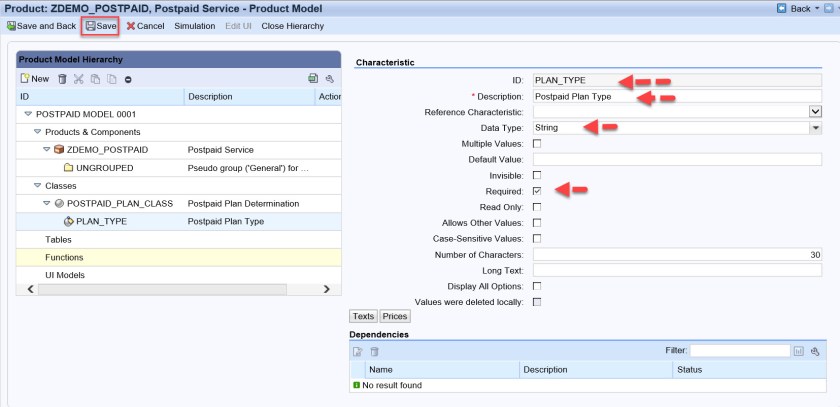
As the SERVICE- ZDEMO_POSTPAIS, we can have different plan post paid plan types.
So provide the name and description and marked this characteristics as Required.
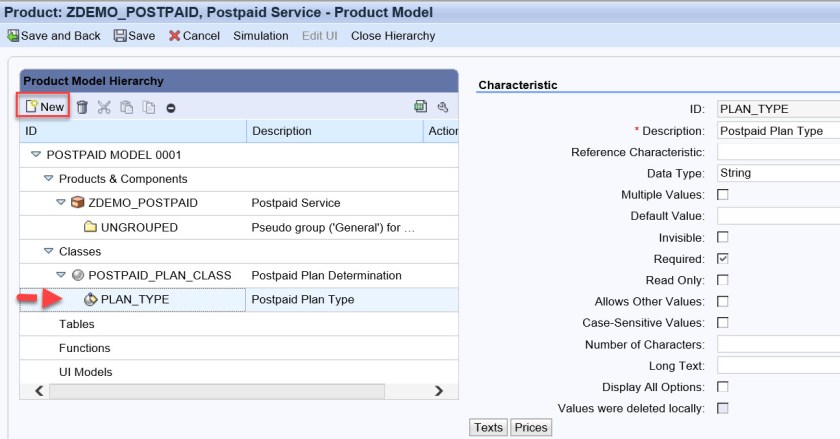
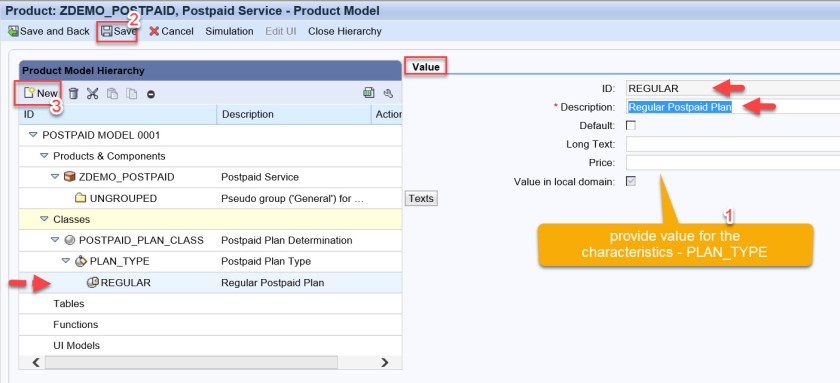
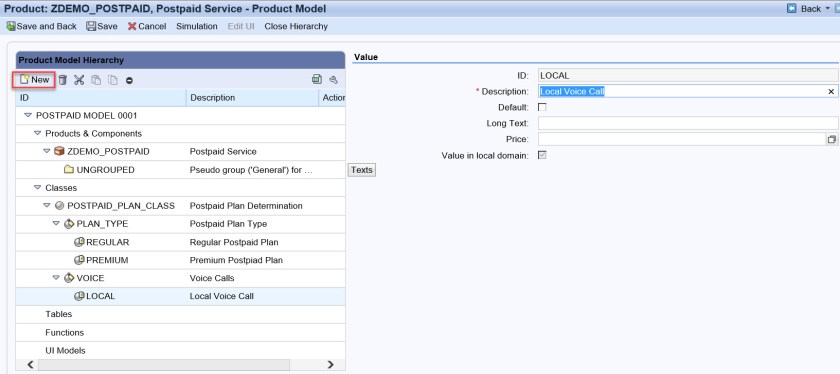
Now we need to define some values to our characteristic” PLAN_TYPE’. Choose Characteristics and Select NEW button.
Its asks for the value. Provide a value and description. Similarly create one more value for the characteristics.
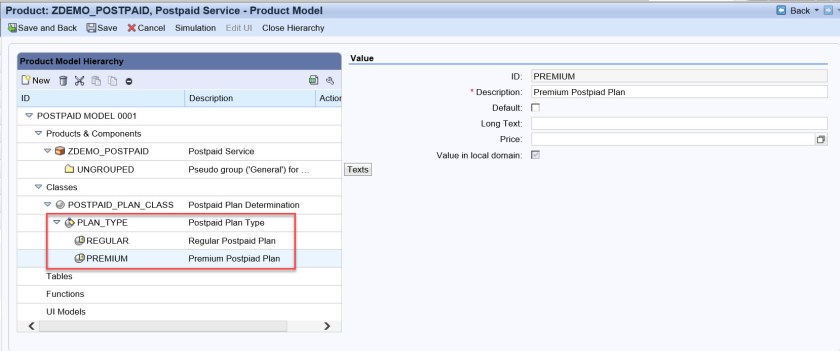
Up to now, we have defined a characteristic (PLAN_TYPE) and have some values of it.
Similarly let’s define some more characteristics in the class and assign some values to each characteristics.
Select the class again and choose new and select characteristics.
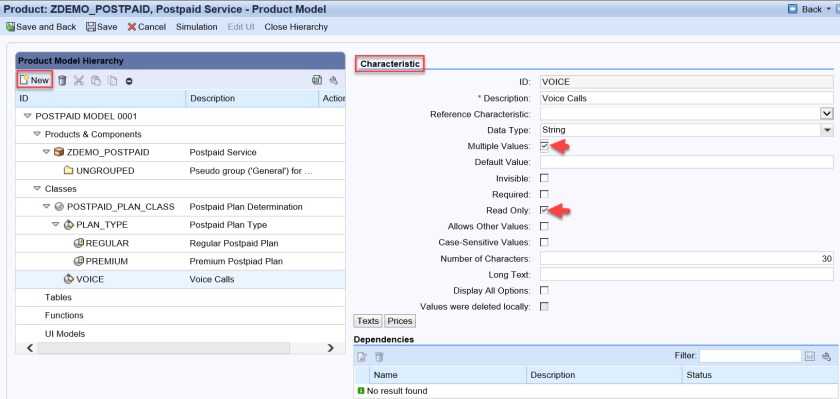
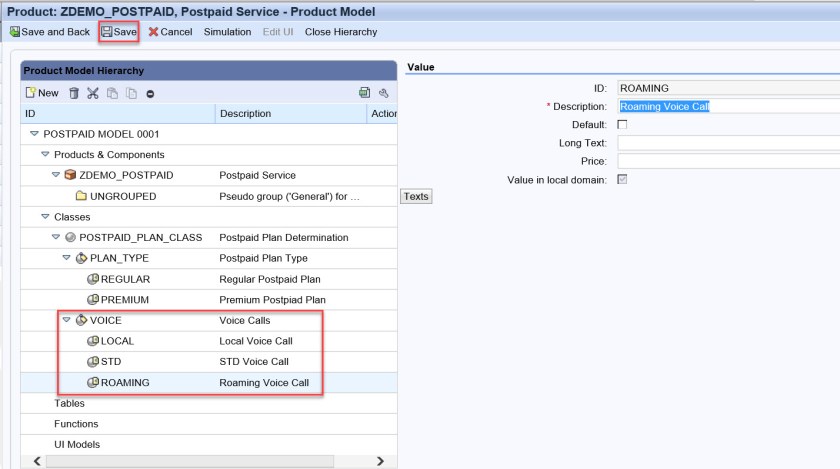
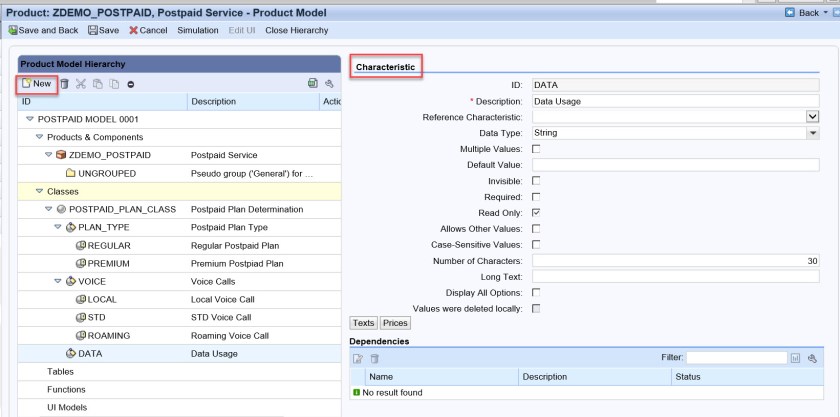
Below screen appears. provide characteristics as: VOICE and for this the values can be multiple(checkbox) and its read only. We will understand why it is read only as this characteristics value must be set based on the another characteristics PLAN_TYPE.
Similarly create some values for this characteristics. LOCAL,STD, ROAMING
Similarly create one more characteristics and create its value under the class.
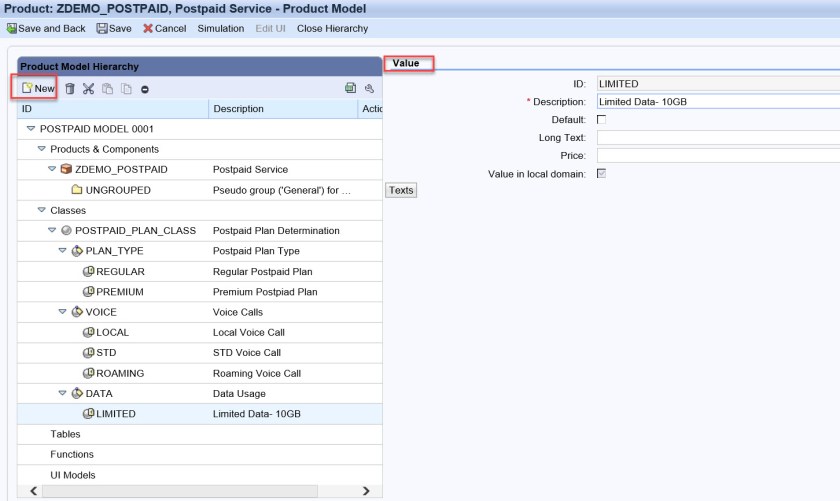
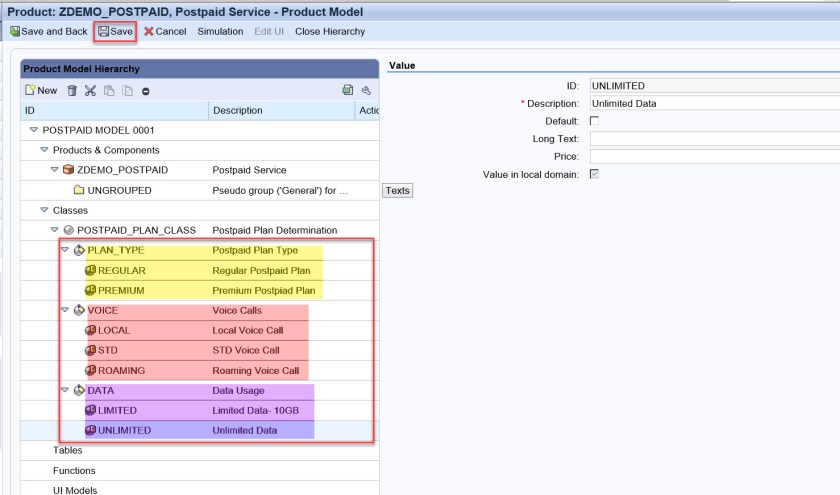
Create : DATA as characteristics and its values as below as LIMITED and UNLIMITED.
So far we have 3 characteristics under the class and now lets define the dependency between these characteristics.
The ides is if we choose PLAN_TYPE as REGULAR/PREMIUM then it should fill values for other dependent characteristics like VOICE and DATA for some values.
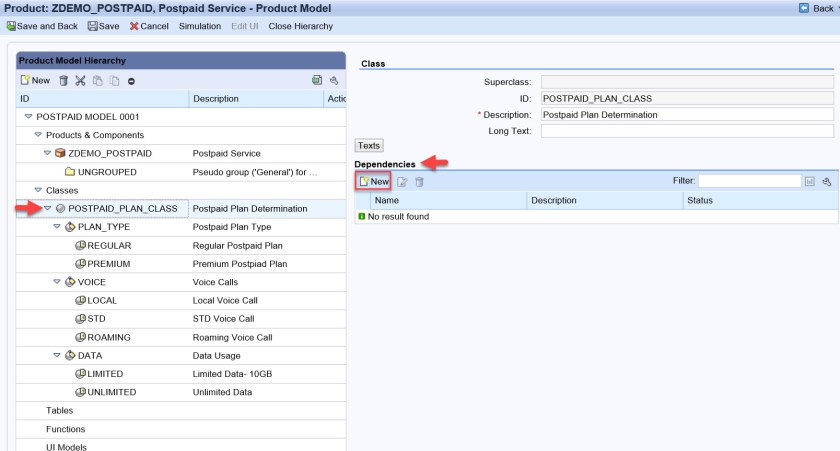
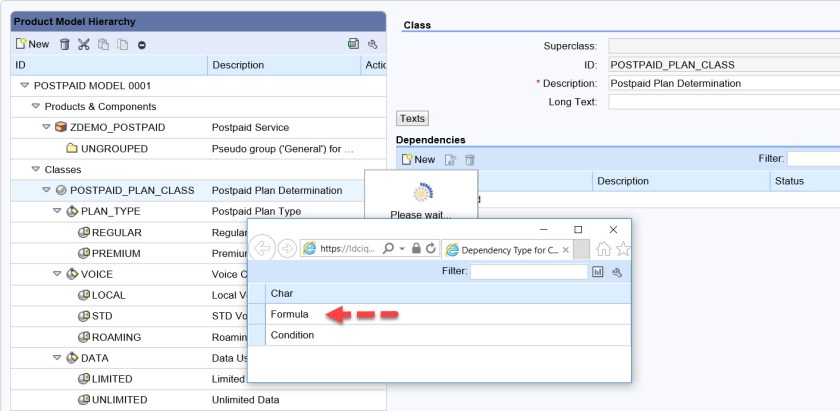
Choose Class and from right side section, under Dependencies choose ‘New’ button.
Choose Formula.
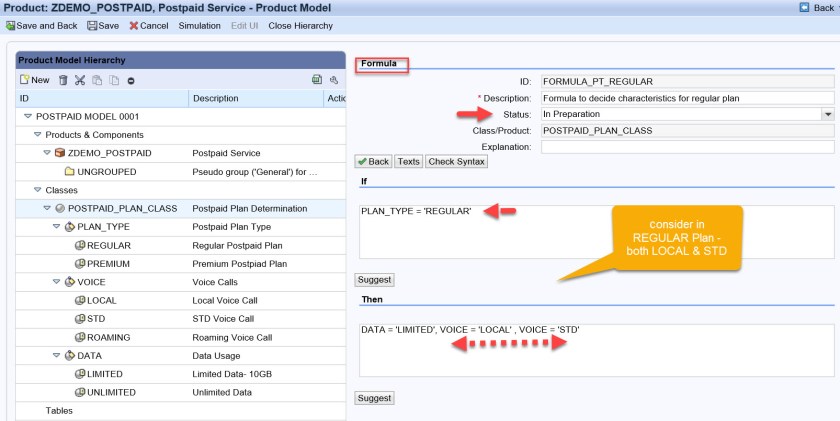
Provide a Formula ID and Description.
Now we have a IF and THEN section. So provide the code as below and you can choose the CHECK SYNTAX option to see if the code is correct or not.
For VOICE characteristics, we have set multiple values, so in the THEN section we can set multiple values.
Finally change the status to Released.
Similarly create one more Formula for PLAN_TYPE as PREMIUM.
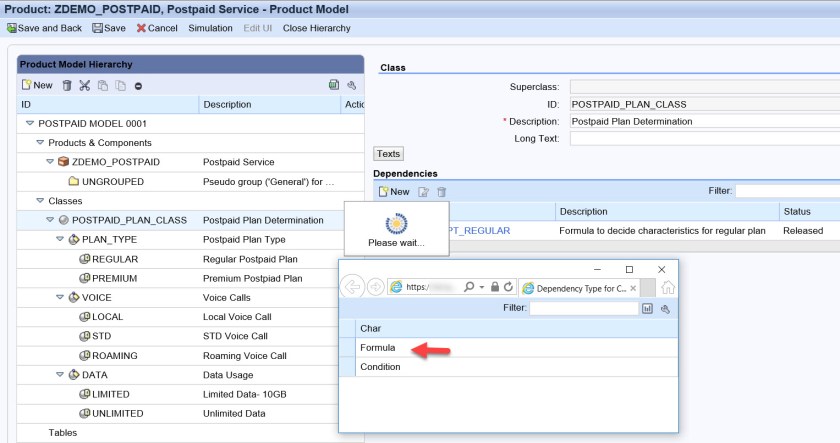
Release and Save.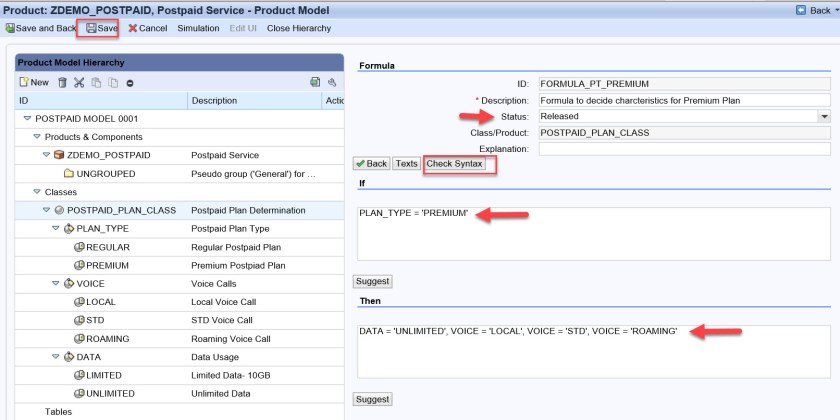
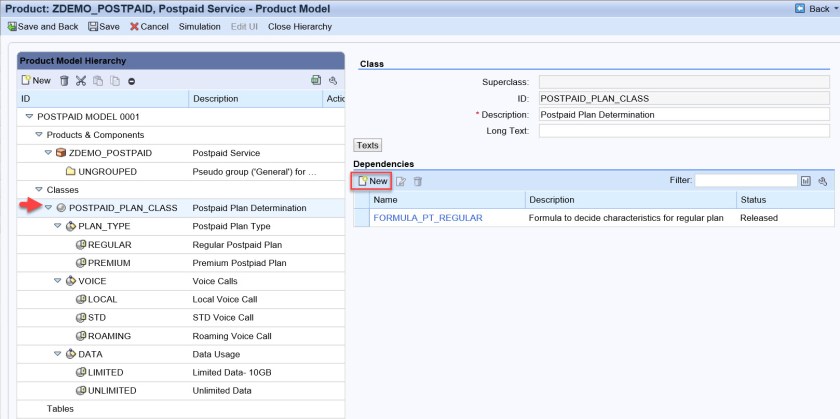
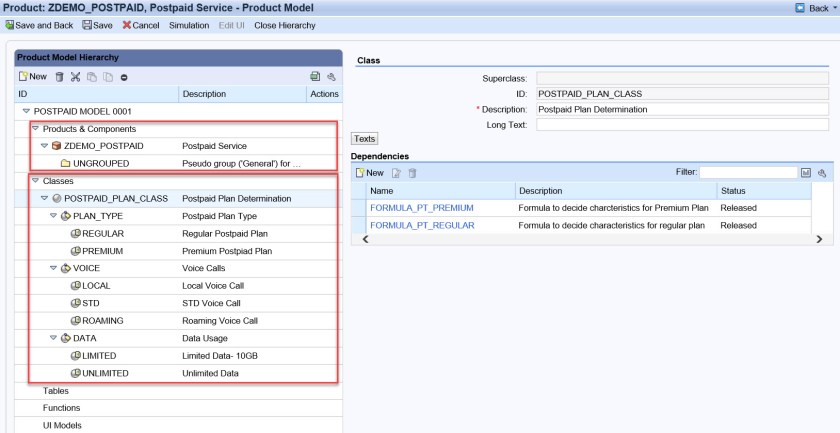
So upto now, we have a single class and 3 characteristics and via Formula dependency established within characteristics.
Now we will assign this formula to the product , so that the product inherits all the attributed like characteristics and formulas from the class.
Choose the class and Select New button.
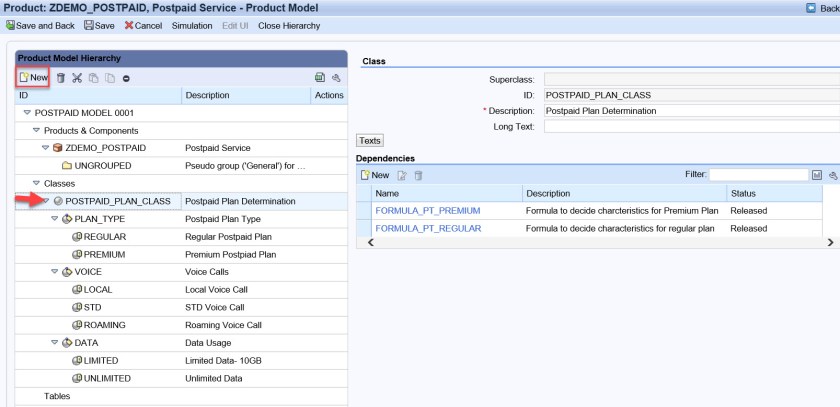
This time choose ‘Product’.
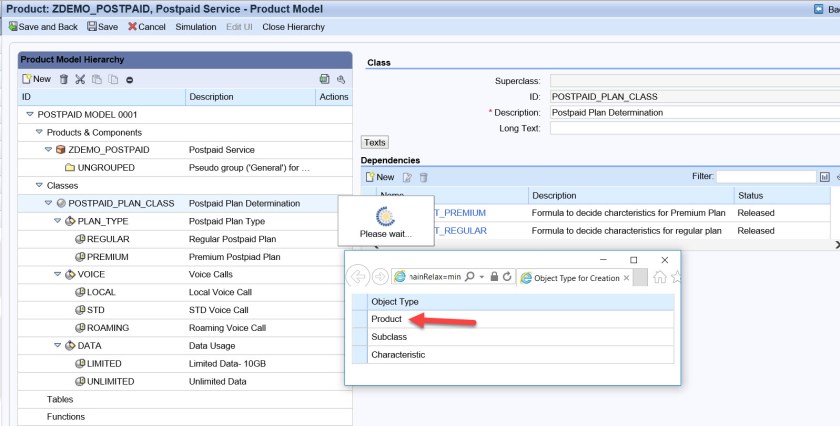
From the drop down choose the Current Product.
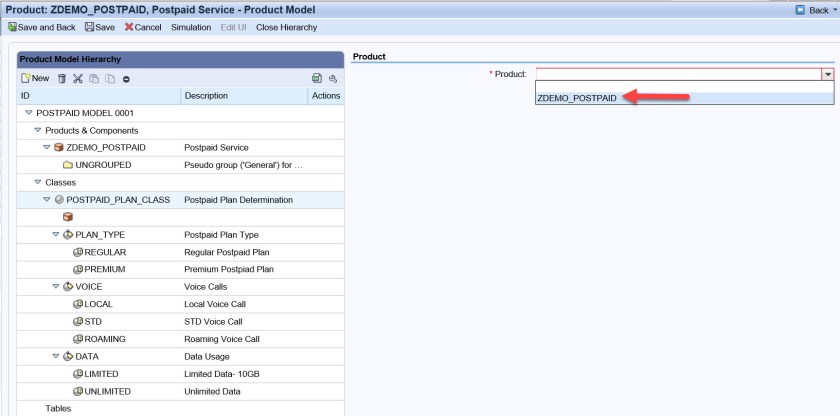
So now the product is added to the Class.
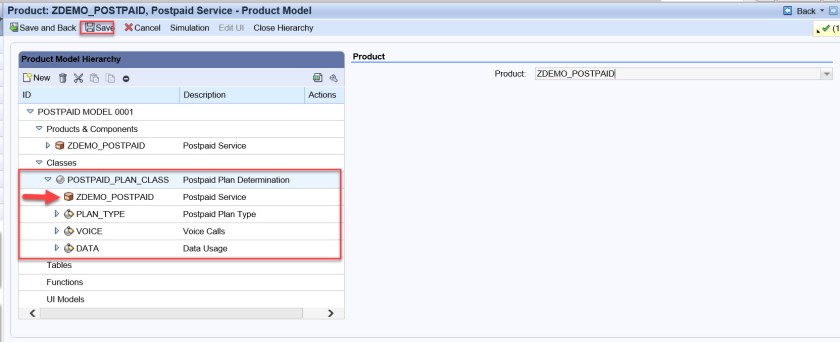
If you expand the class, then you can see all the characteristics.
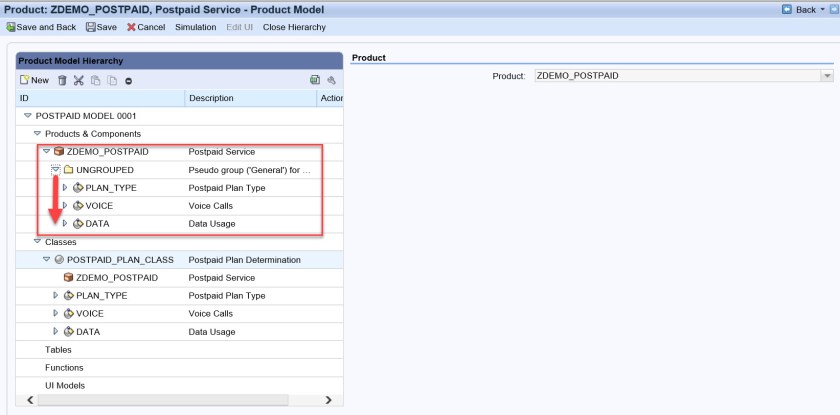
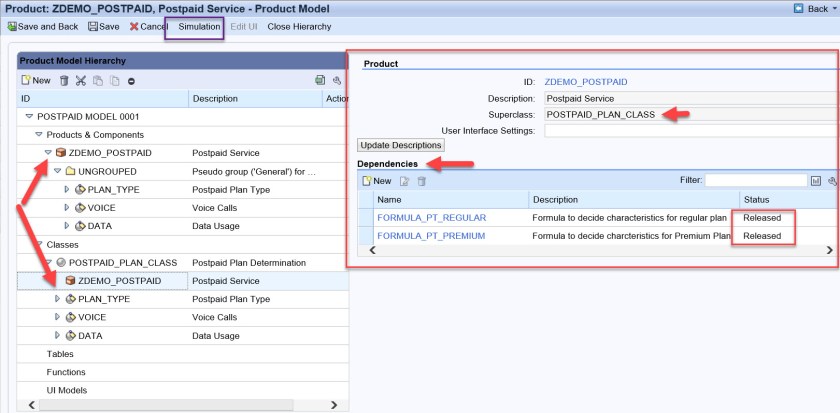
If you select the product then you can see the Dependencies “Formulas” also applied to the product.
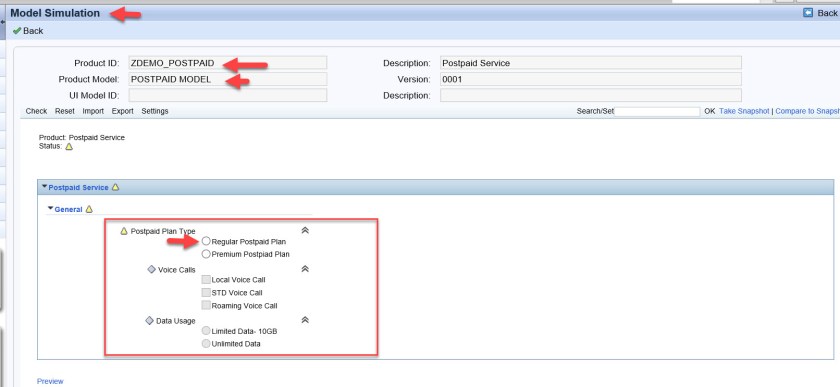
So far so good. lets try to simulate the product configuration. Choose Simulation.
Below screen appears. Out of three characteristics we have made 2 dependent characteristics ( VOICE & DATA) as read only so that these can be automatically determined via characteristics PLAN_TYPE with help of Formula.
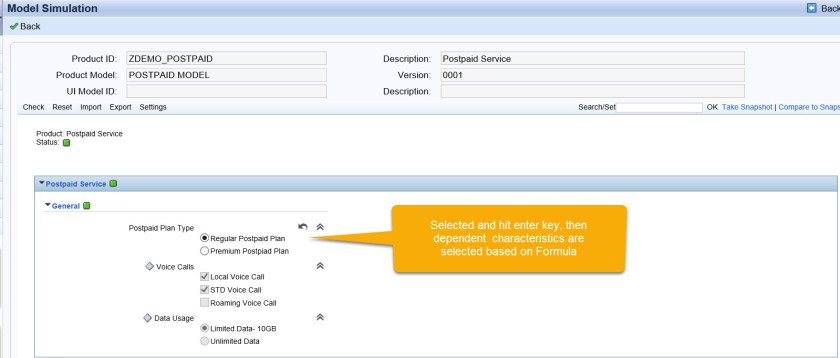
Choose PLAN_TYPE as Regular and hit enter key and then all dependent characteristics are filled.
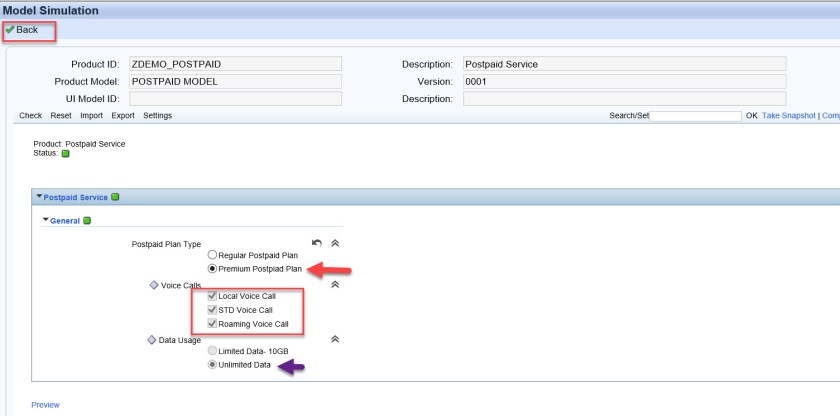
Choose PLAN_TYPE as PREMIUM and hit enter key and then all dependent characteristics are filled accordingly. So the test is successful and go back.
Now RELEASE the model. Save and Go back.
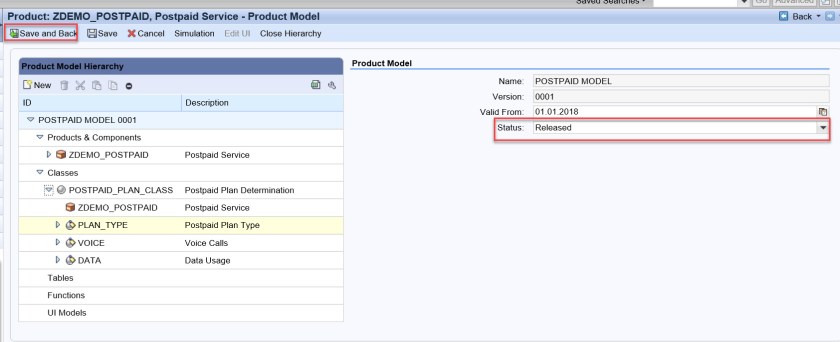
Here the status would be In Preparation and after applying changes the status becomes active. Go back.

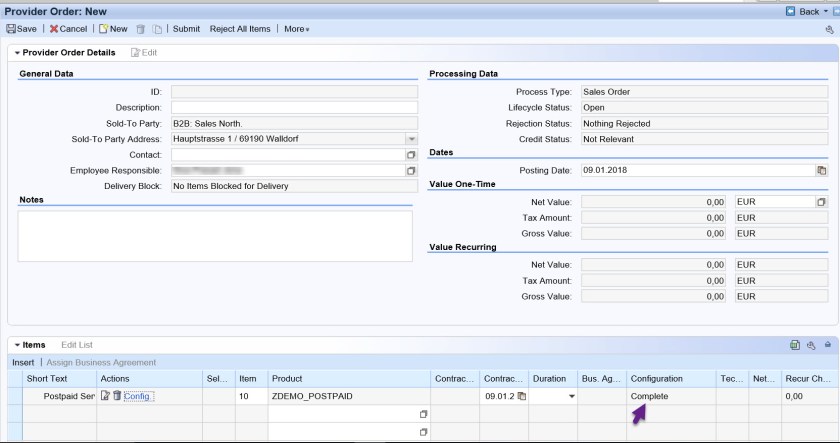
Now to really test this configurable product, we have to use this product in some order and try to configure it. As we have a provider rate plan service product, lets create a provider order in CRM to test.
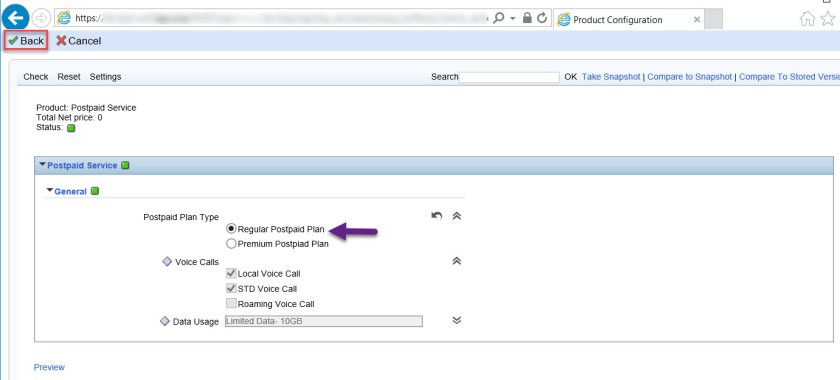
Provide the item ZDEMO_POSTPAID and under Actions we can found a Config link. Select it.

Here we can choose the plans and accordingly dependent attributes are set. Go back.
Once the product configuration settings is applied in the order, the Configuration status becomes ‘COMPLETE’.
Hope this post helps CRM beginners to understand the product modelling and configuration.

Does anyone know how to BRF+ can be used with CC ?
LikeLike
Hi,
Being a new to product modeling , i really got some insight while reading this post. But i would like to know what is the role of the Class here. In particular we can create characteristics and related attributes without creating class. Why do we require to create class. If this class is accessible to other product as well then in such case it would be great. Is there anyway that we can use this class for some other product(for example PREPAID_PLAN).
Regards
LikeLike