 UI5-Consuming oData service & building Fiori App
The post shows to build a Fiori App using oData service.
The steps are:
- Creating a oData Service in Tx- SEGW for the flight model.
- Activating the oData service in Tx- /IWFND/MAINT_SERVICE
- Build a UI5 application(Table) in Eclipse which uses the oData service
- Uploading the UI5 application as BSP application in ABAP Repository
- Creating Launch Pad Configuration Tx- LPD_CUST for the BSP Application
- Creating Semantic Objects Tx- /UI2/SEMOBJ
- Crating Fiori Launch Pad Configuration Tx- /UI2/FLPD_CUST to create Catalog and Group
- Creating Role in Tx- PFCG & assigning the Fiori Catalog & Group to the role.
- Testing the Fiori tile in Tx- /UI2/FLP
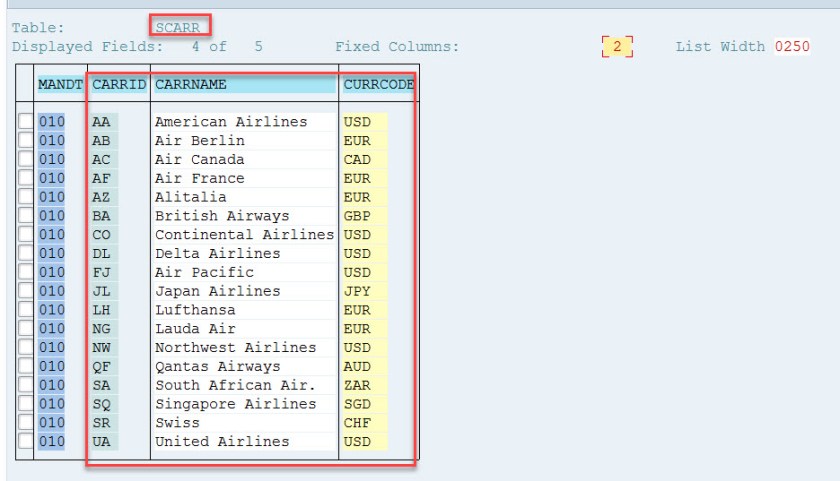
For the oData service, we will use flight model data- table SCARR
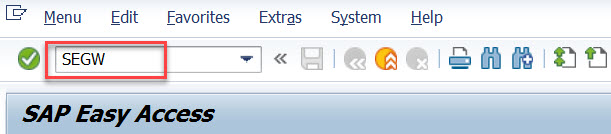
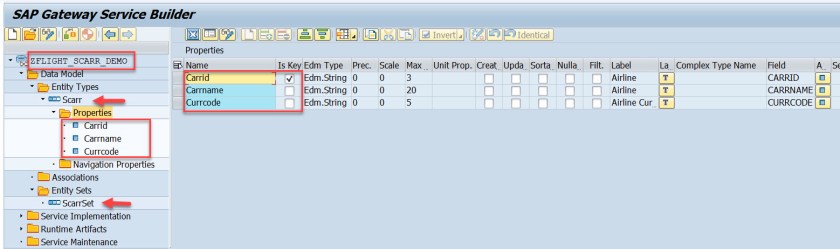
To build a oData Service go to Tx- SEGW and crate a project and create entity type by referring DDIC structure- SCARR and add only three fields.
Also create a entity set-ScarrSet
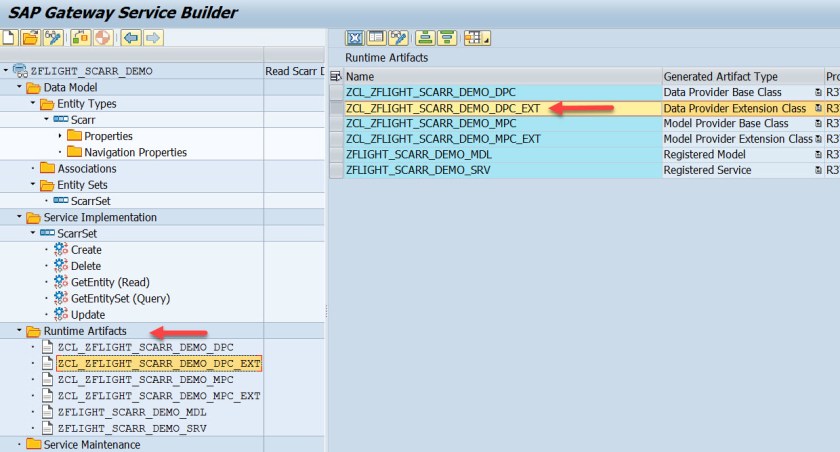
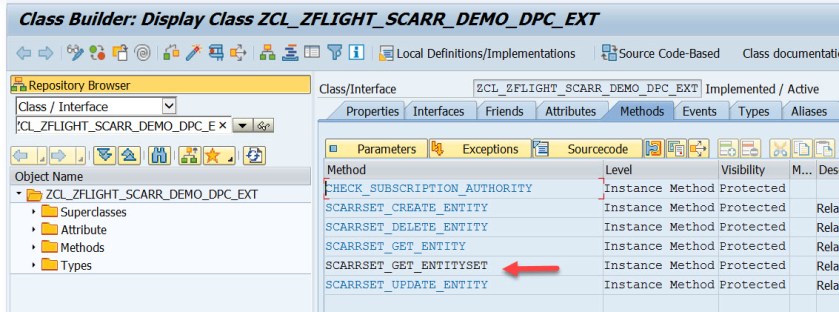
Generate the run time artifacts. It creates data provider class and modelling class and the service. Double click on the data provider extension class as marked.
Redefine the SCARRSET_GET_ENTITYSET method.
Write a simple select query on SCARR table and fill the exporting parameters.

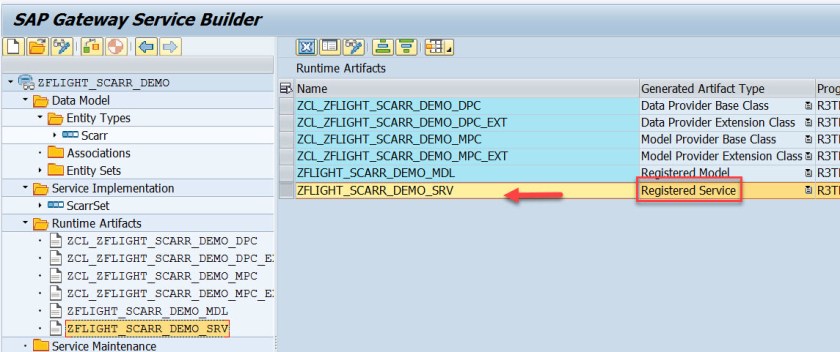
So the oData service name as : ZFLIGHT_SCARR_DEMO_SRV
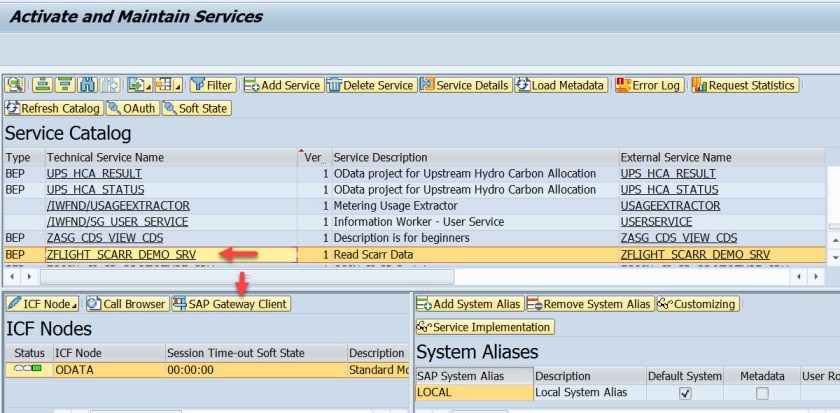
To activate the service execute the TX-

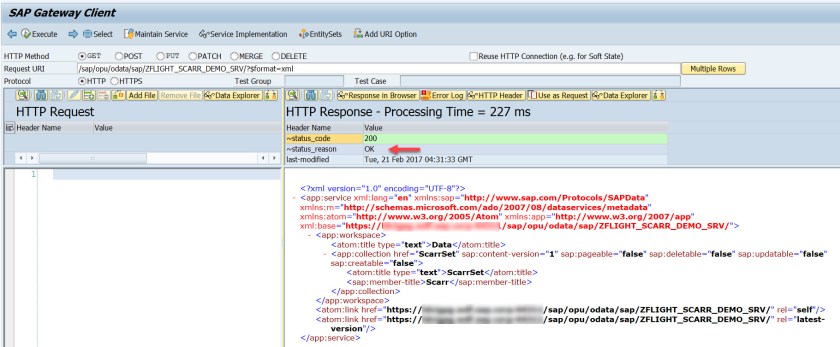
Here Use ADD Service button to add the above created service in Tx- SEGW. To test the service select the service and choose SAP Gateway Client button.
Choose Execute.
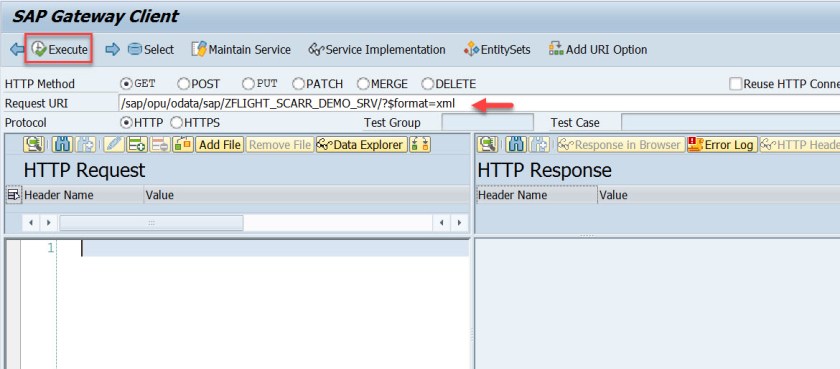
The return code is OK.
Change the url : “add the entity set name after the end of the url and execute.
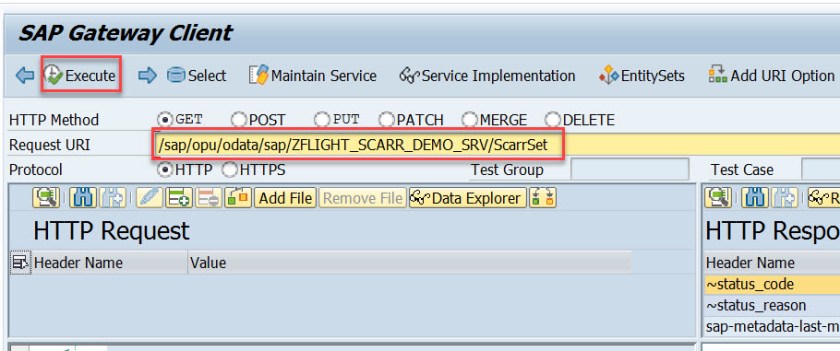
So it gives out all the records from the scarr table.

Up to now we build the oData service and tested successfully.
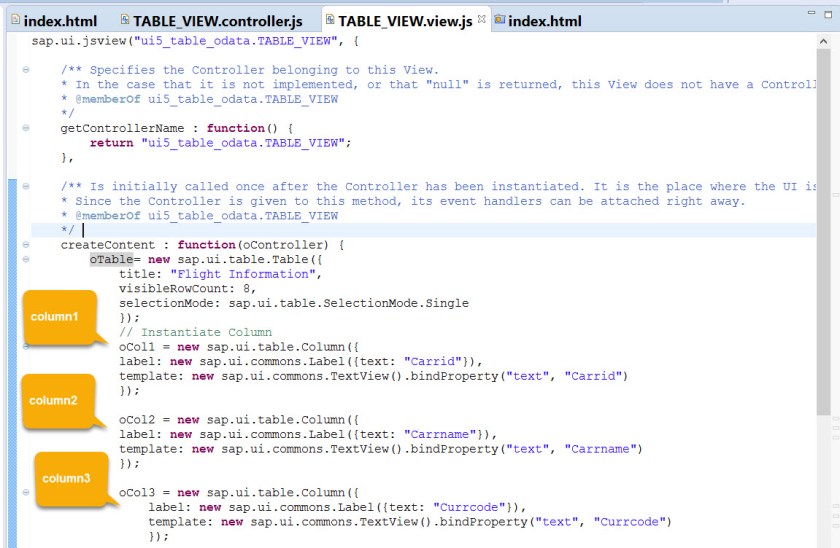
Now lets create a UI5 application in Eclipse- The UI5 application create a table with 3 columns and consume the oData service.
Create a project “UI5_TABLE_ODATA” with initial view name as “TABLE_VIEW” ( java script view).
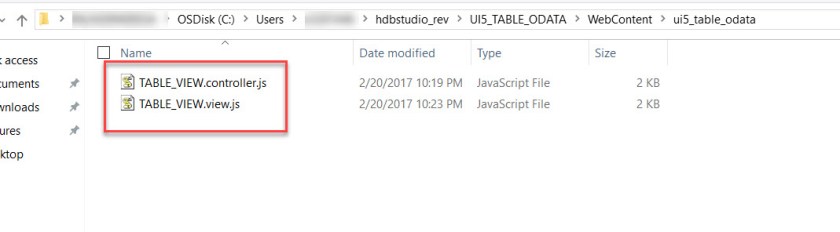
It created 3 files, index.html, table_view.view.js and the controller as table_view.controller.js.
In the index.hetml file, add the table library in the bootstrap section.

In the view, build the table with 3 columns. The column text view should match with oData service entity type fields.Build a oData model and bind to the table.
Bind the entityset to the table rows.

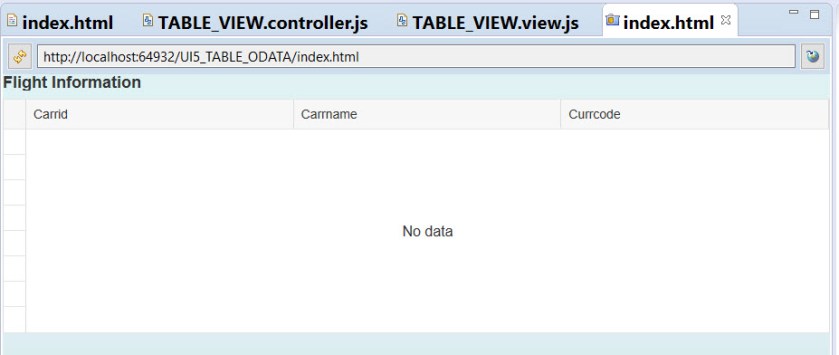
If you run the preview, you should see the table without data because in the UI5 application , the oData model is created with the url where it doesn’t include the server name and port. This is fine for our demo.
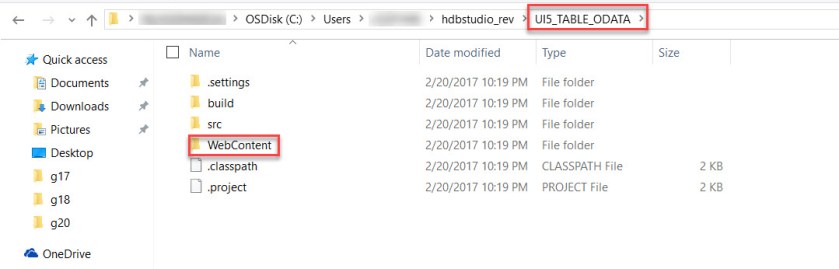
The UI5 application created must be stored in the local compute in some workspace section.
In my computer is is stored in the below path. Just figure our where is the WebContent folder is located.
In web content folder we have the index.html file.
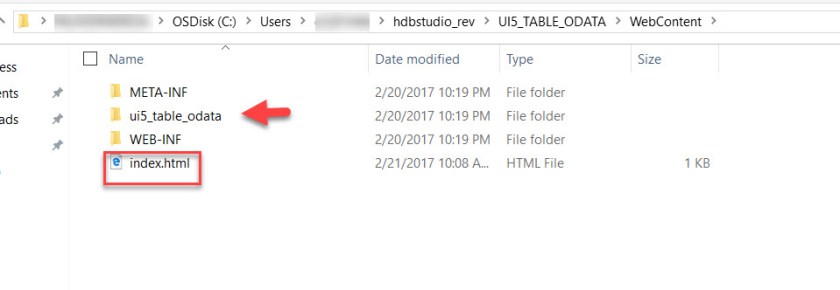
and here we have the view and controoler.js files.
The next part is to upload this UI5 application as a BSP application into our abap repository.
Execute Tx- SE38 and run the program-/UI5/UI5_REPOSITORY_LOAD
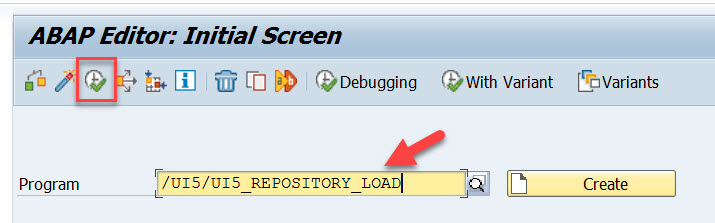
The below screen appears.
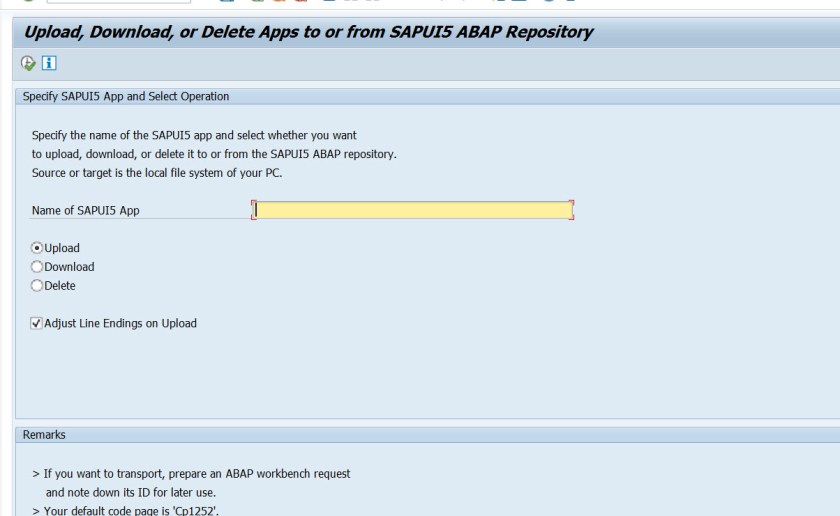
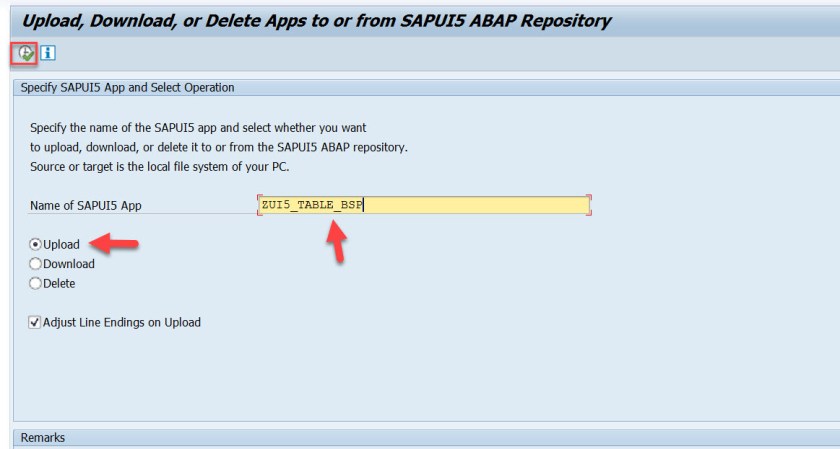
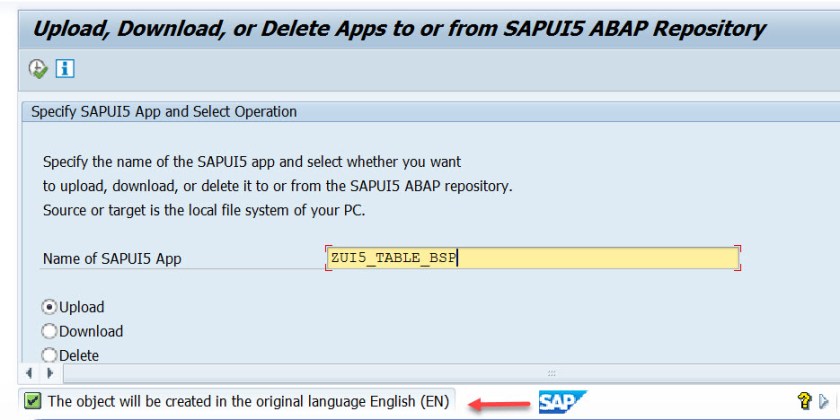
Provide a name here (This is the name with which it will create a BSP application bu uploading the web content file of the U5 application). Choose Upload and execute.
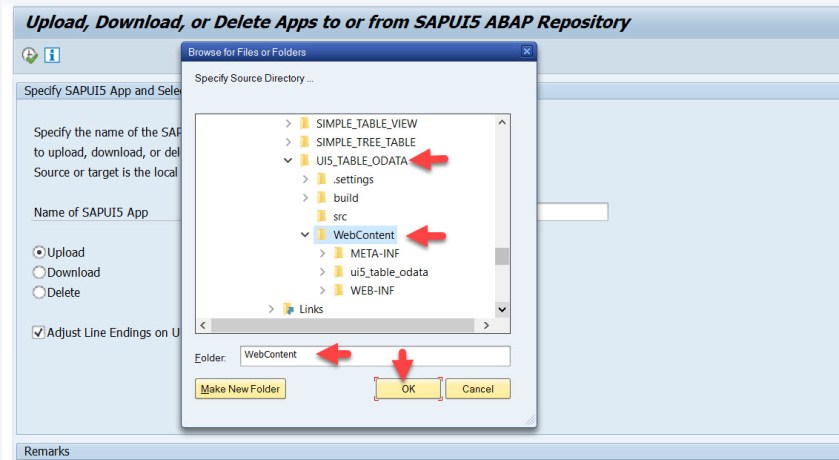
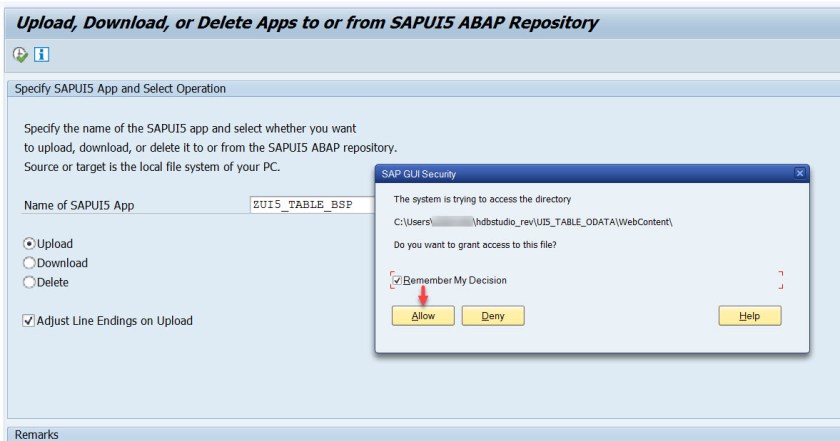
From the popup appears, here we have to provide the web content folder of the UI5 application.
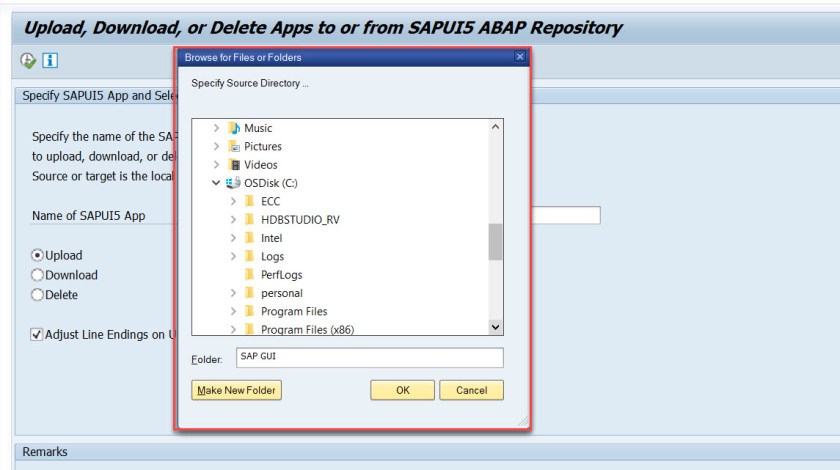
Select the UI5 web content folder and choose OK.
Choose allow.
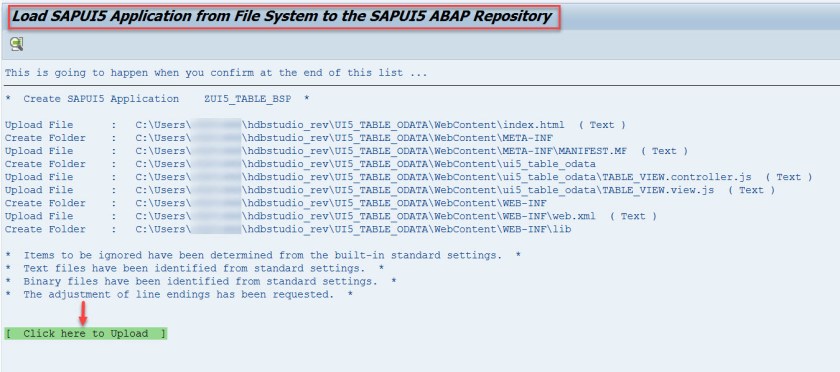
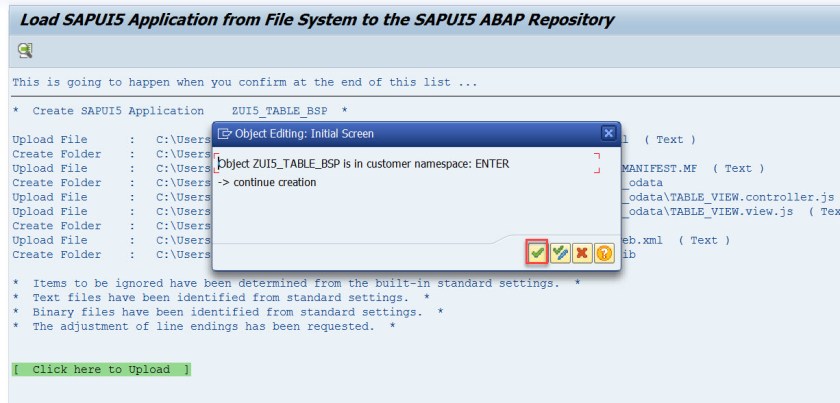
The program checks the web content folder and shows the list of files and folders it is going to create in abap repository as a BSP application. Now click on Green text to upload.
Provide a description, package and may be your Transport name. For demo i am providing $tmp package.
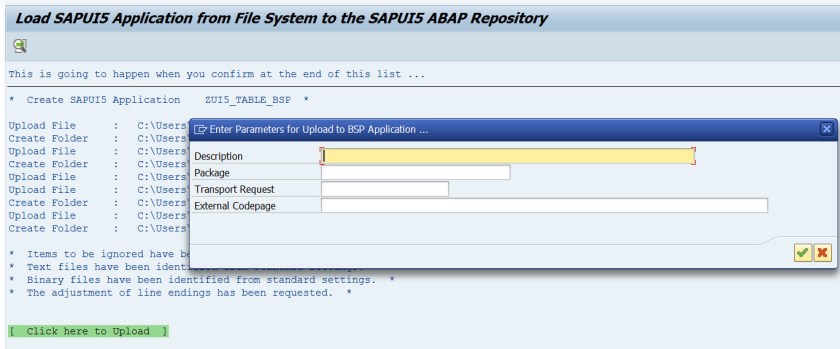
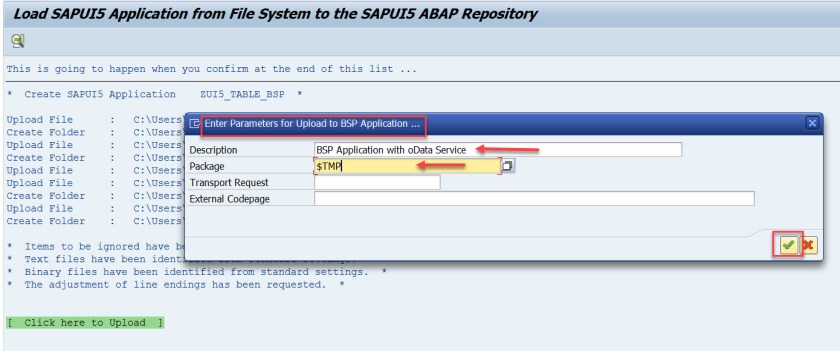
Continue.
The pop up comes multiple times for each file. Allow every time.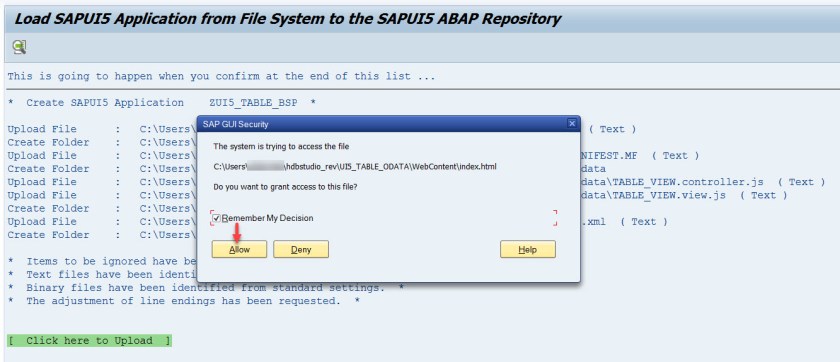
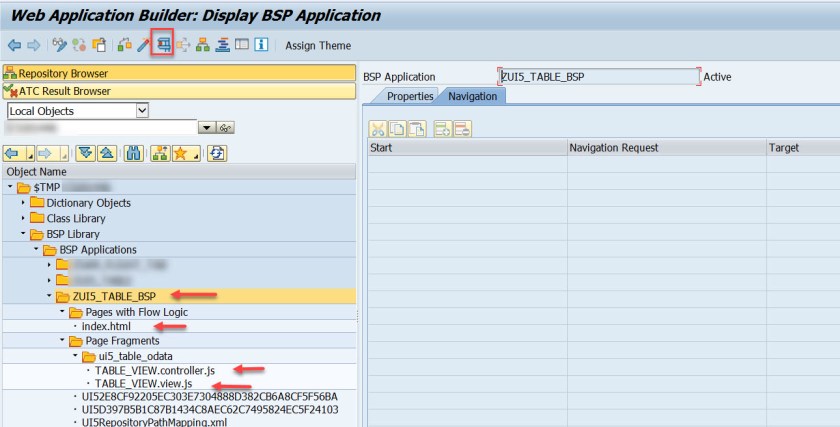
Finally it creates the bsp application with a status message as shown below.
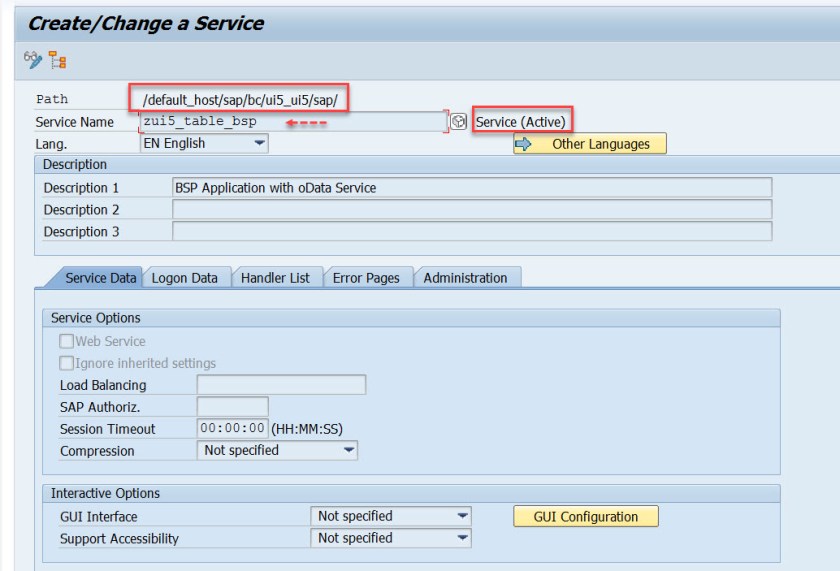
Go to Tx- SE80 and open the package and open the bsp application.
Execute the BSP application.
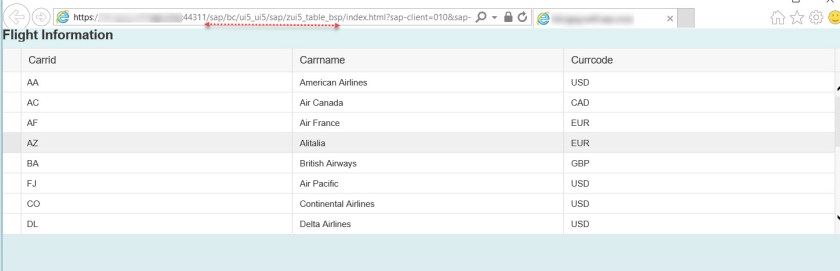
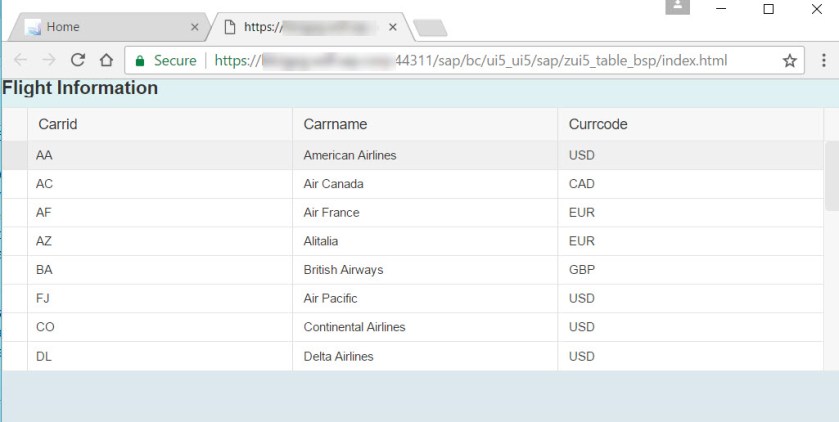
It displays the table with data. Just mark the url of the bsp application.
The BSP application, you can see the service created in Tx- SICF in the path as highlighted and it is active.
Up to now we have created a BSP application out of a UI5 application that consumes the oData service. Now we have the BSP application url.
The next step is to create a lauchpad application and map to the bsp application url.
Go to Tx-  Click on New Launchpad button.
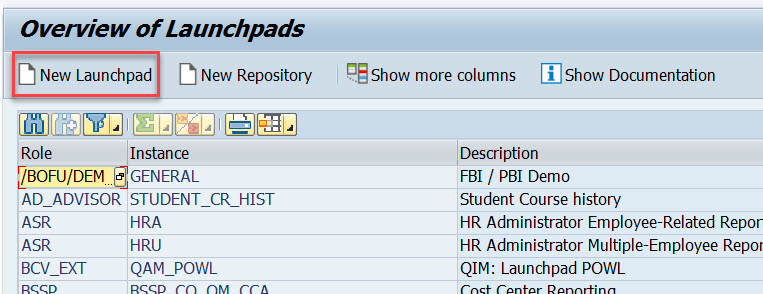
Provide a role name and instance as “TRANSACTIONAL”, a description and continue.
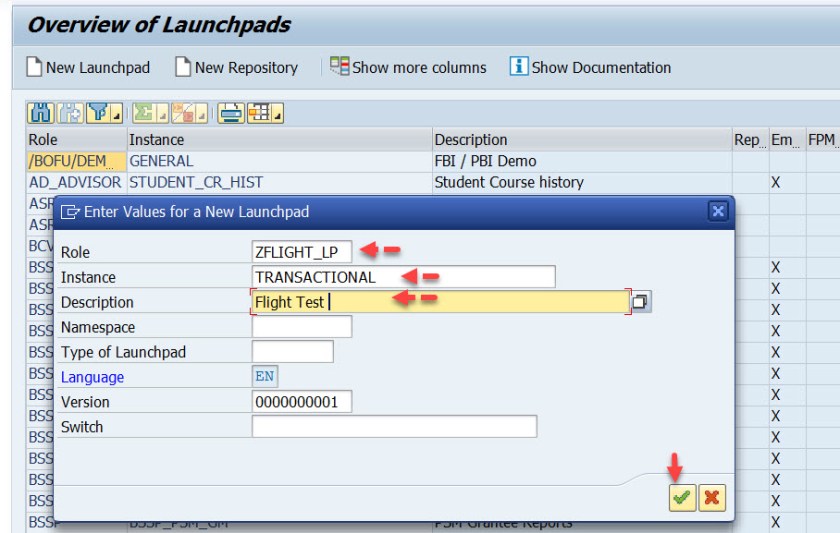
Launchpad role is created . Now create a application under it be selecting New Application button.

The below screen appears.
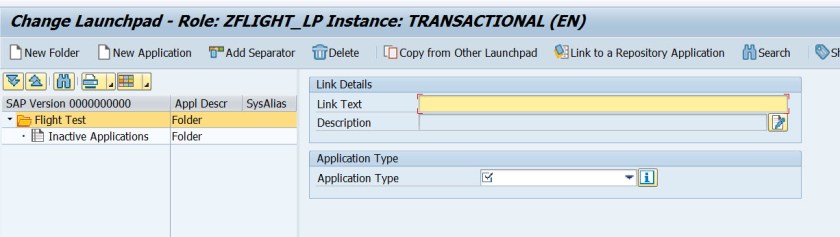
Provide a link text and choose application type as URL.
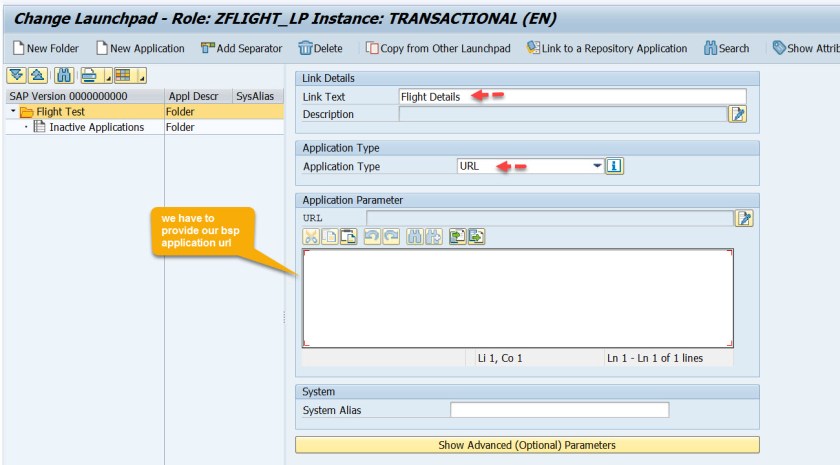
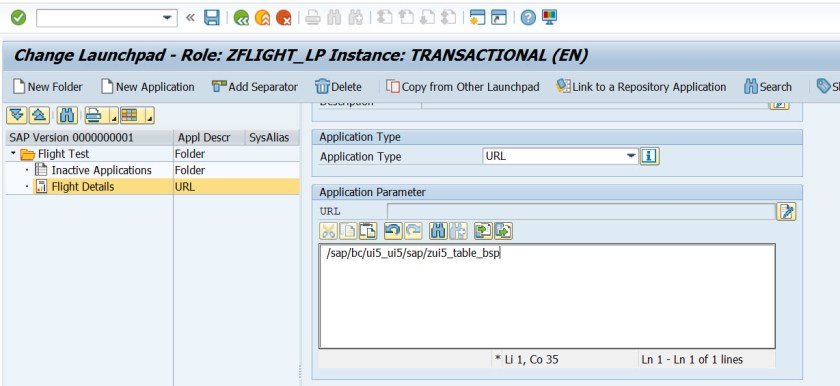
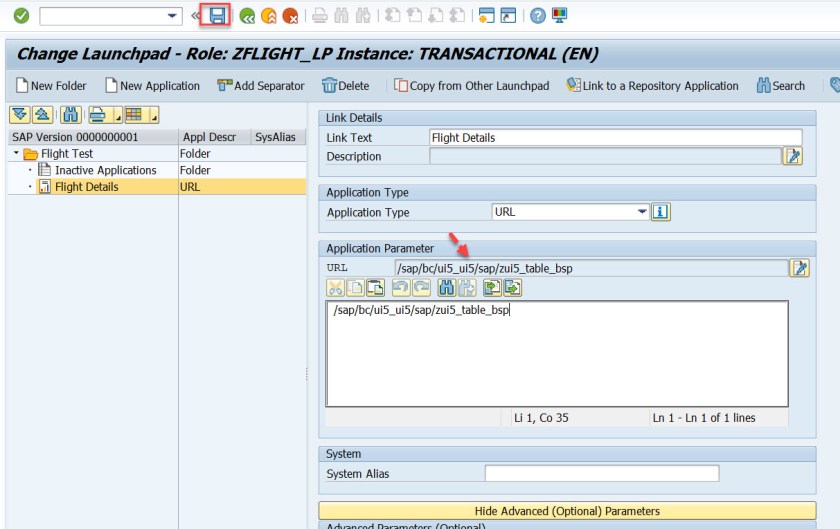
Provide the BSP application name. Only the BSP application path name. Click on Show Advanced(optional) parameters button.
Select the change button for the Application alias field.
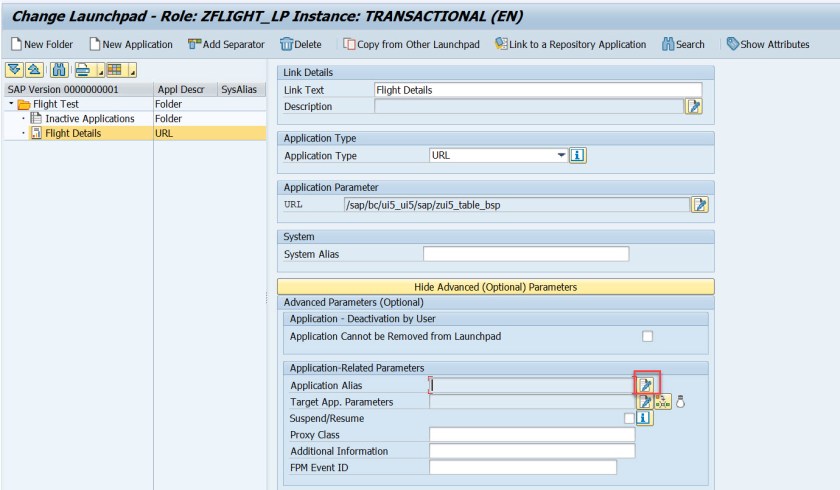
Provide the Application alias name.
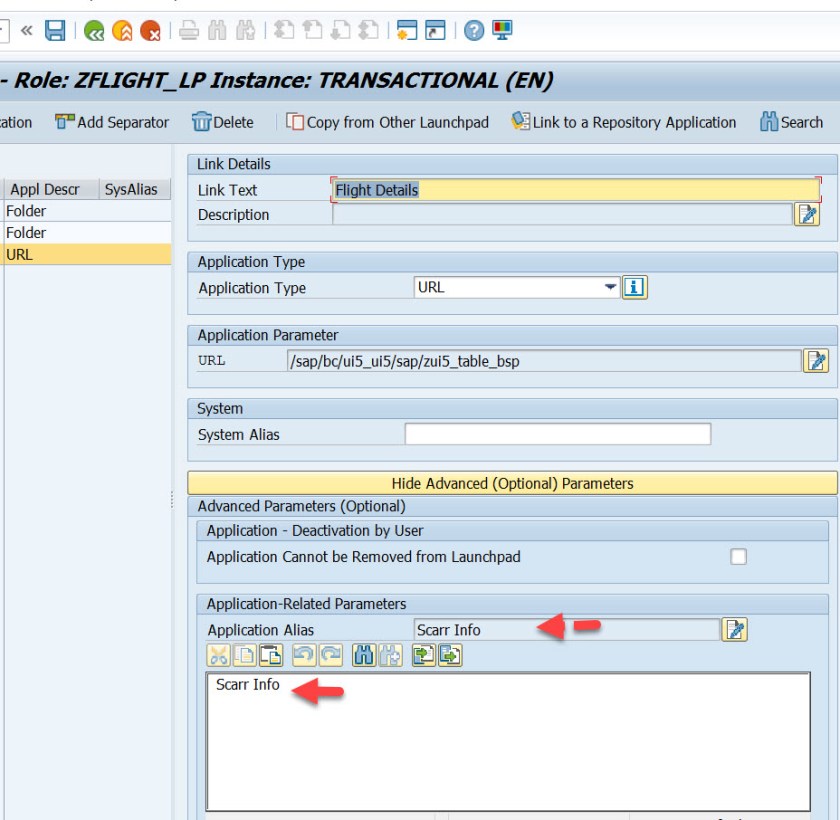
Save it.
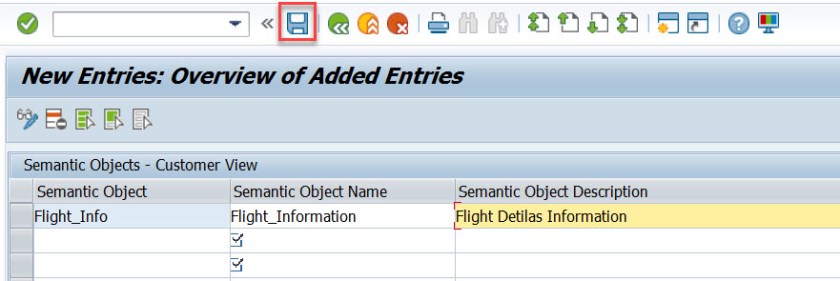
Now lets create a semantic object in Tx-

Clink on new entries button.
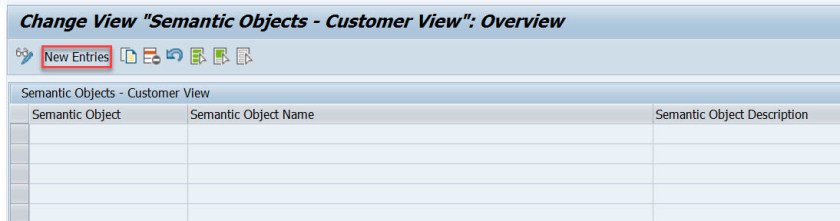
Provide below details and save it.
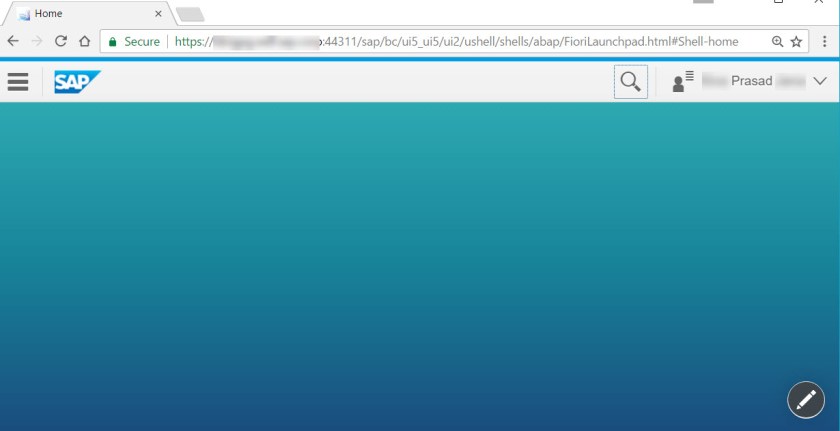
Lets see the fiori launchad. use Tx- 
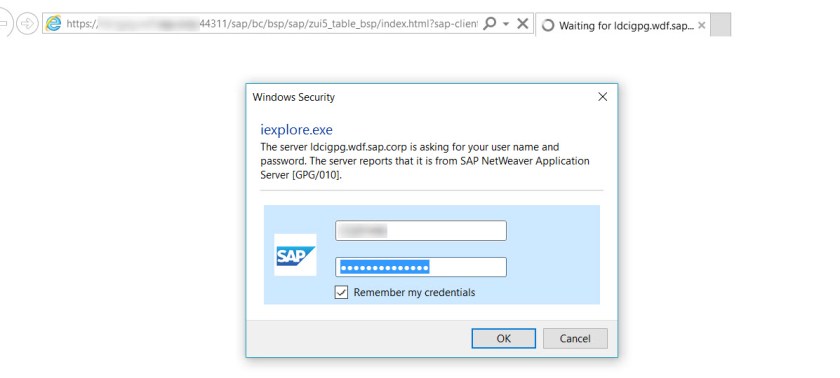
Login with your credentials.

There is no tile available.
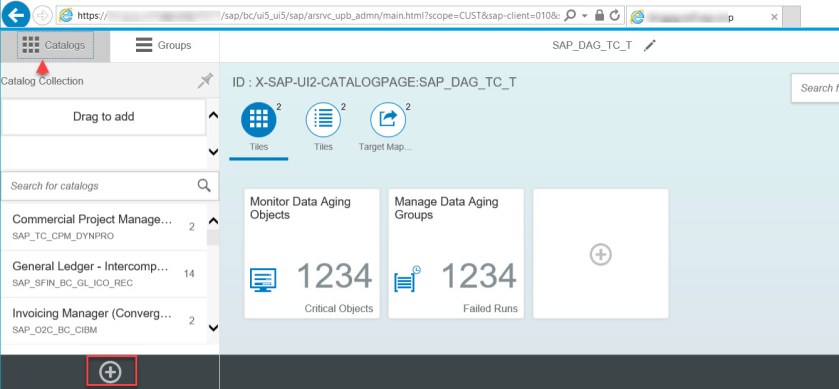
Now we have to do design in the fiori lauchpad to create catalog and groups.
Use Tx-
Now we have the screen.
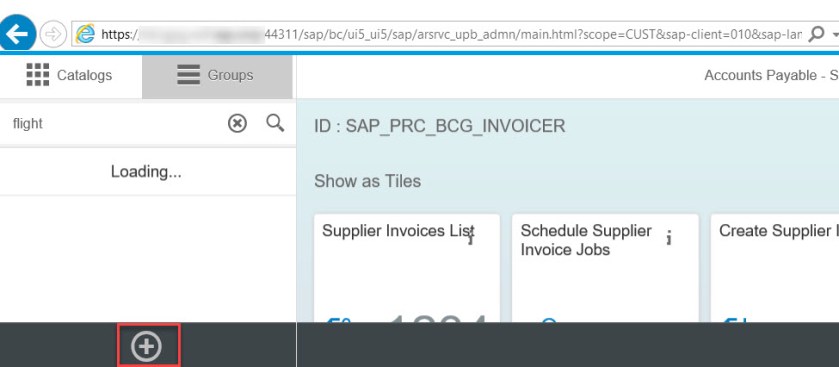
Choose Catalog and select “+” button.
Provide the catalog tittle and ID. Save.
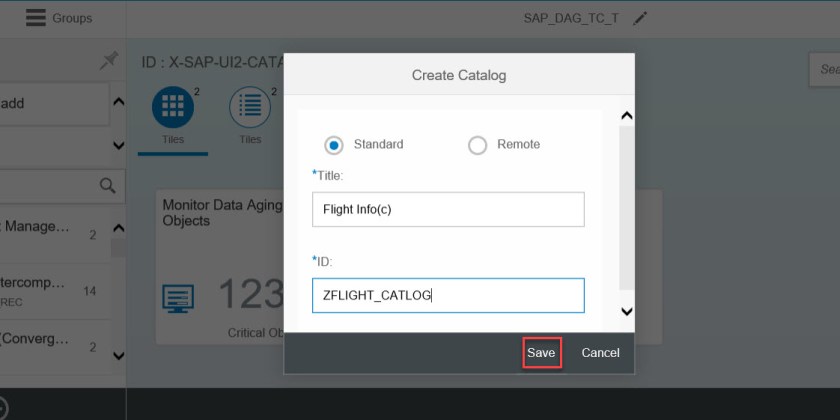
Now we have a fiori catalog.
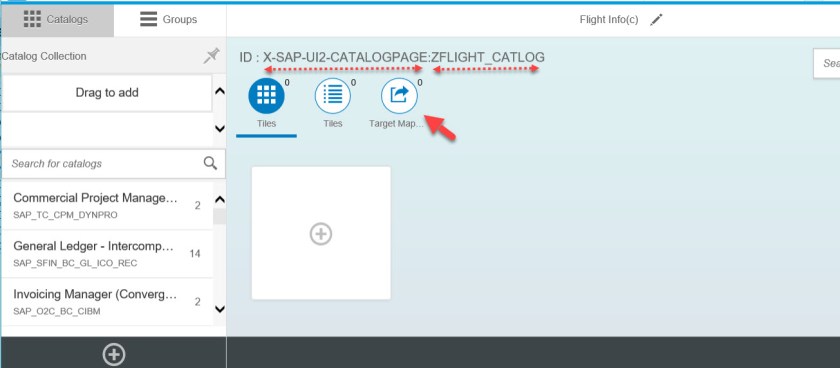
The next step is to create a mapping object.
The mapping basically from the semantic object to the Launcpad application(BSP Appl).
So select the Target Mapping icon.
Choose Create Target Mapping button.
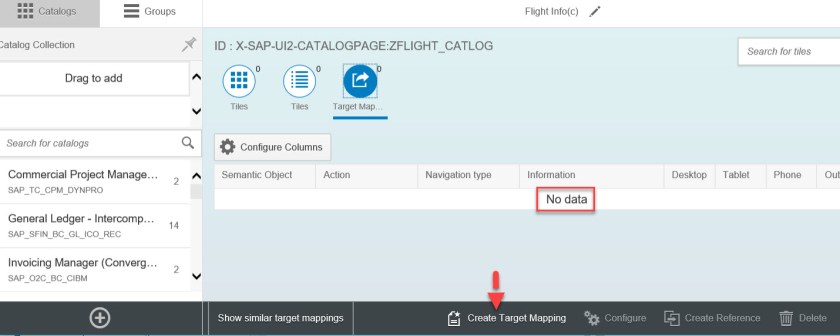
Now a new line is added, just click on the line .

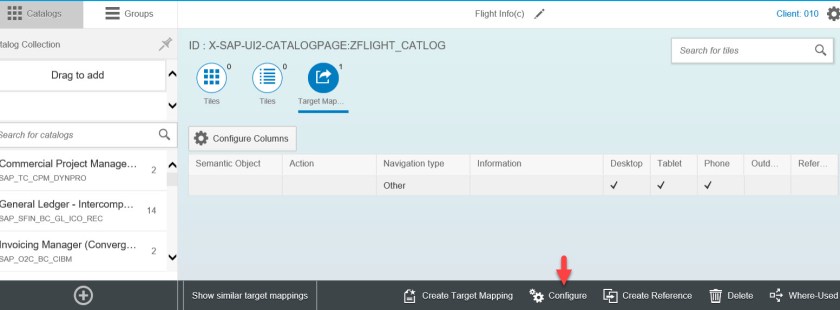
The Configure button is active now. Select Configure button.
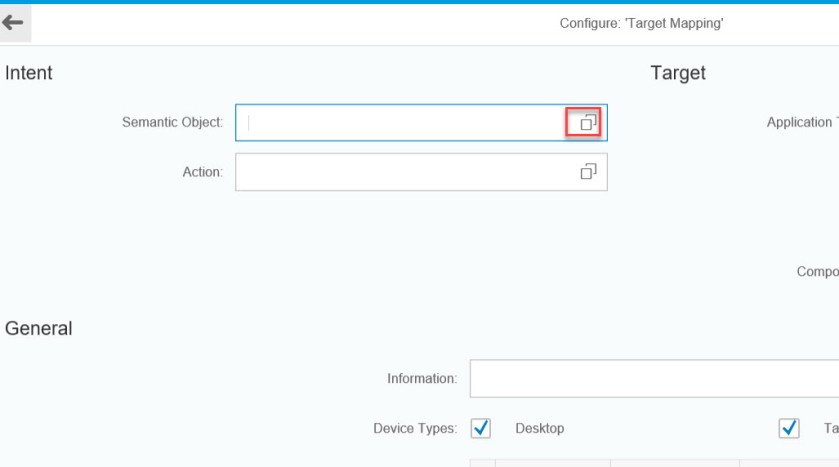
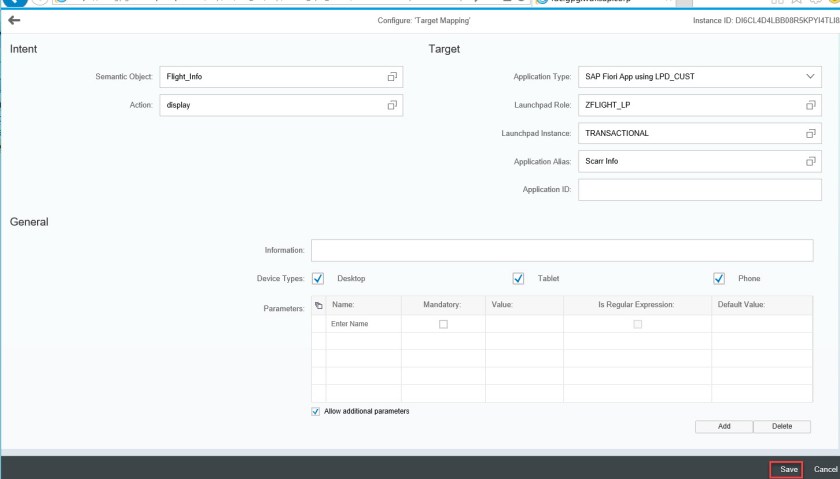
The below screen appears.
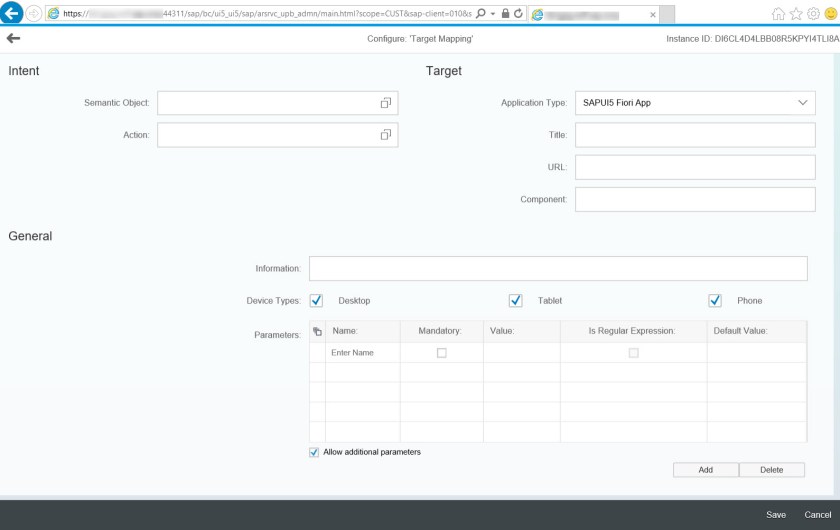
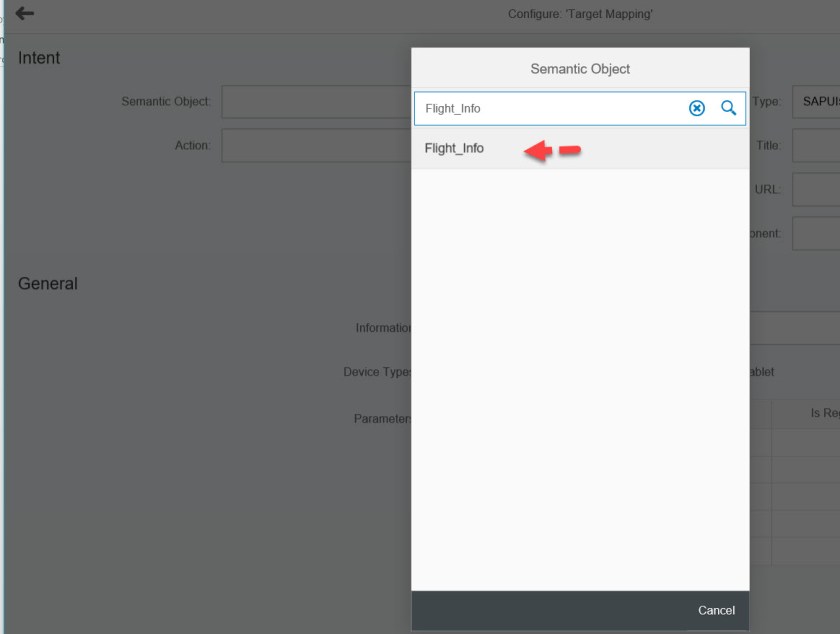
Already we have created a semantic object. So press F4 for semantic object field.
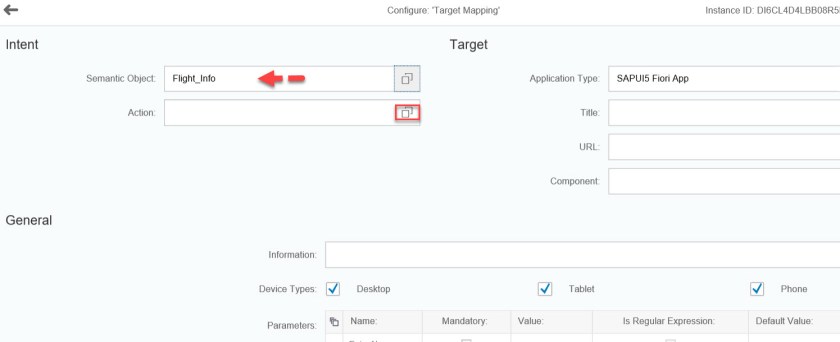
Choose the one that we created for the demo.
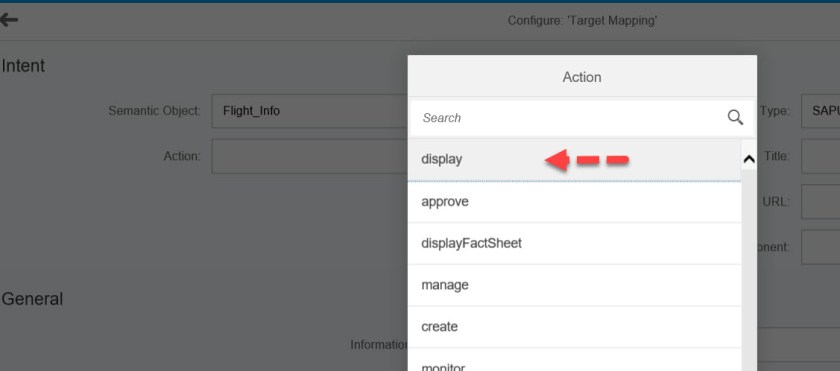
Choose F4 option for the action field.
Choose Display.
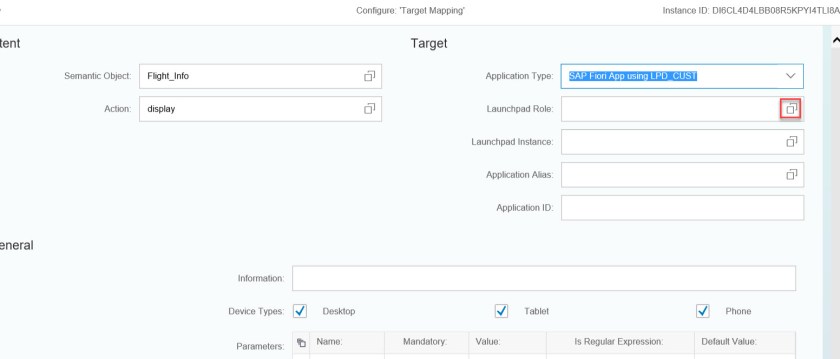
Now in the target section, from the dropdown select SAP Fiori App using LPD_CUST.

Choose F4 option for the Launchpad role.
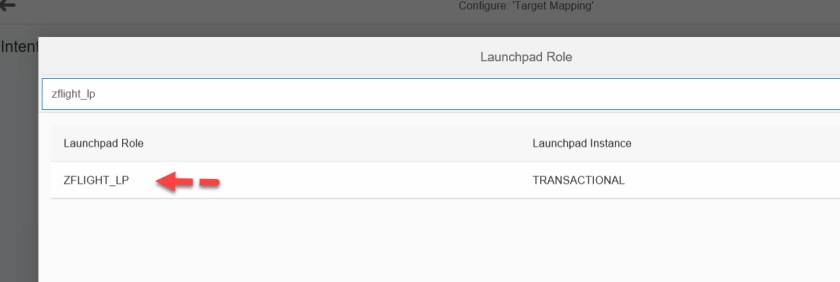
Choose the one we created for our demo in Tx- LPD_CUST
Choose F4 for the application alias.
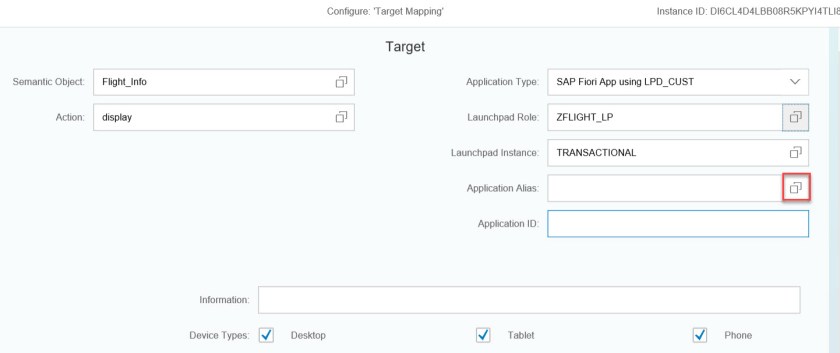
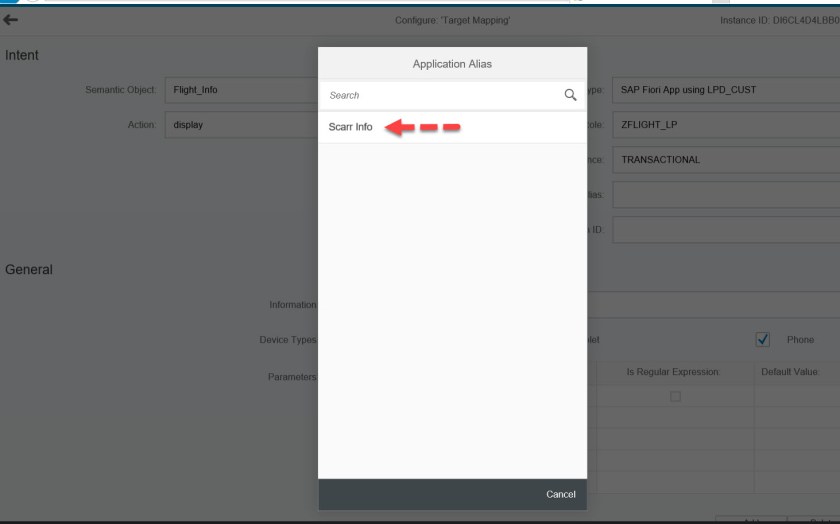
Choose one that we have created for our BSP application.
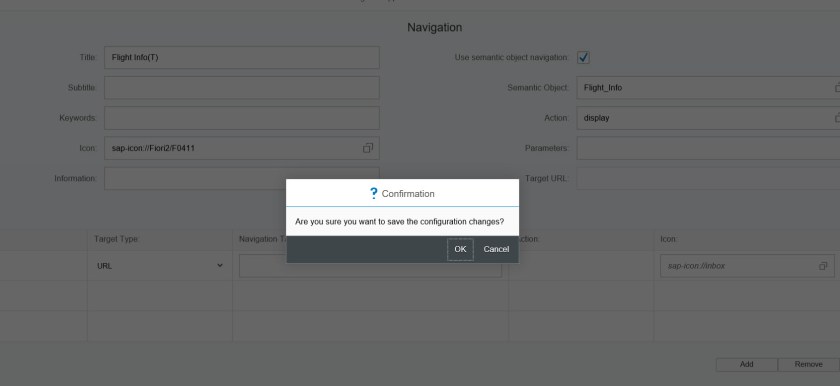
So here we have done with the mapping. Choose Save.
Press OK.
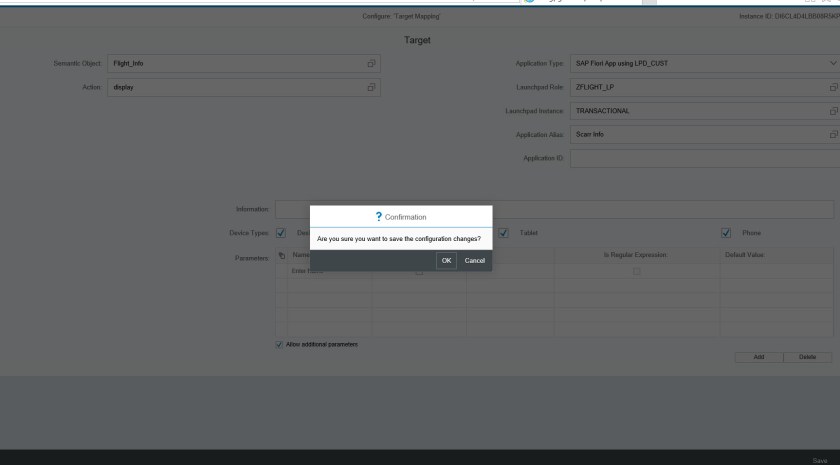
Its back to this screen. So we are done with the mapping object creation.
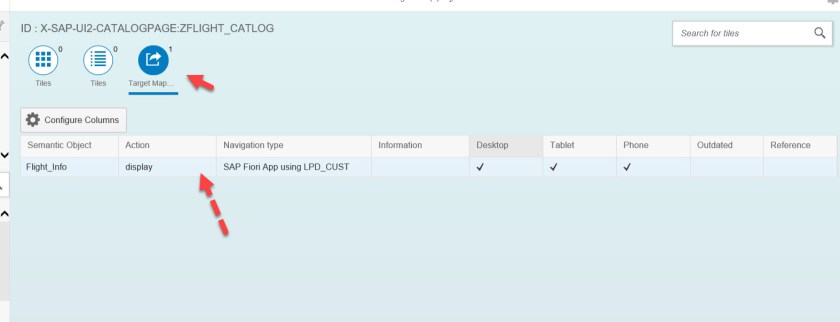
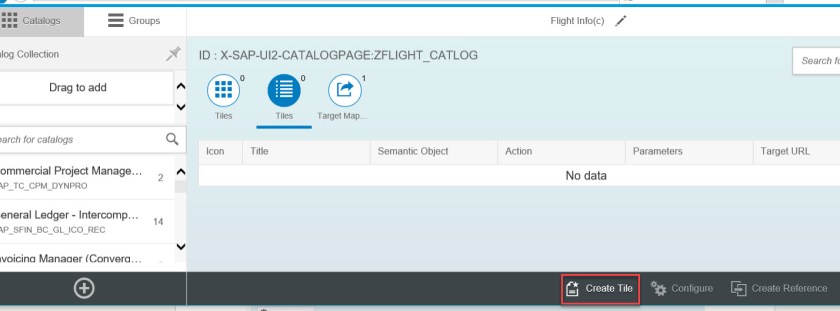
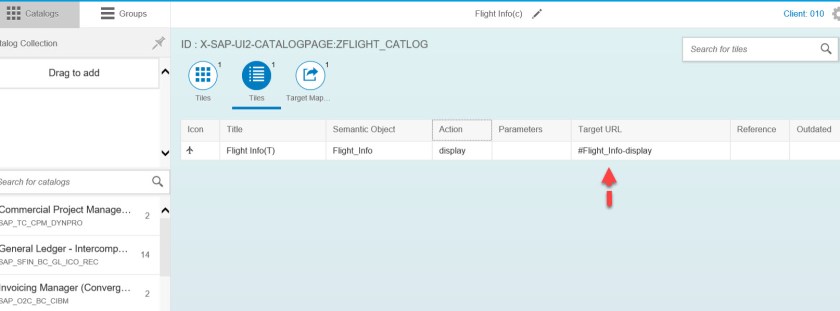
Now we have to create a tile. Select the Tiles icon.
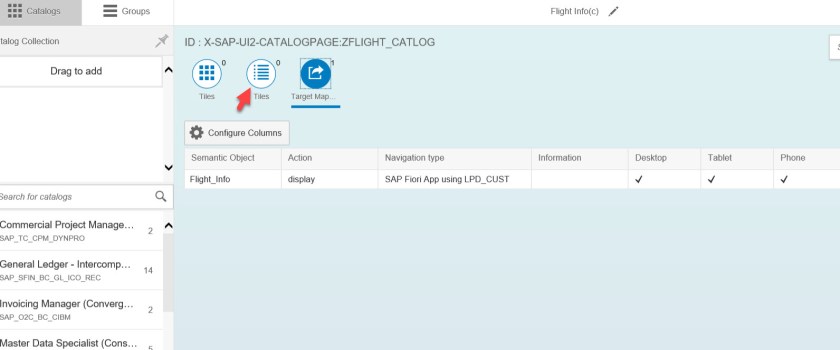
Choose Create Tile button.
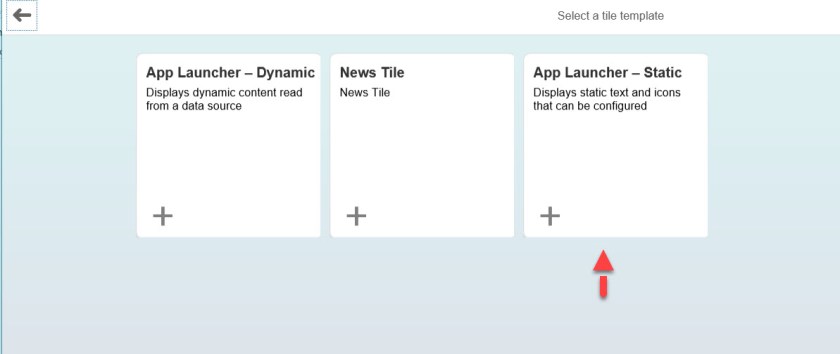
Choose App Launcher-Static tile.
The below screen appears.
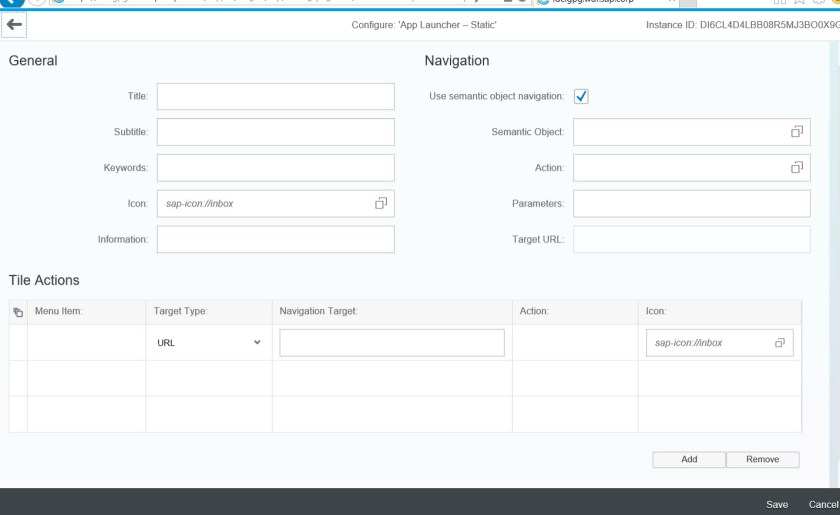
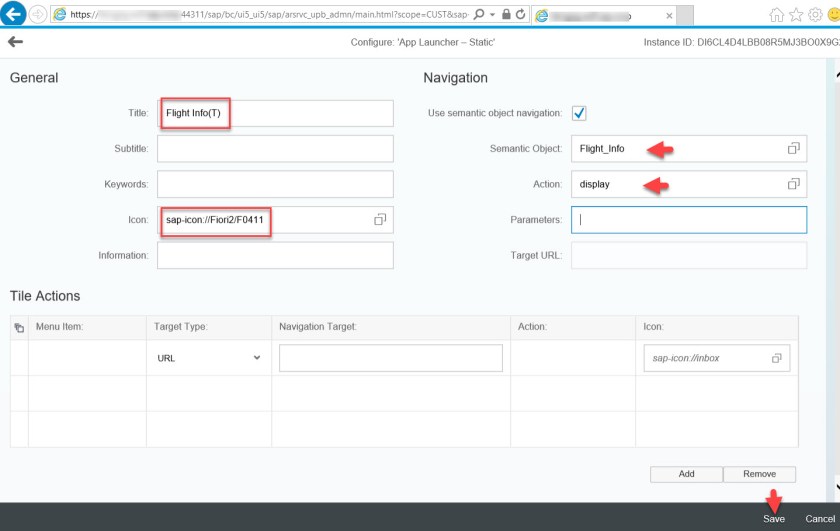
Provide a title, you can provide as sub title also. Choose an appropriate ICON.
In the semantic object section, press F4 and choose the semantic object and action.
Here semantic object comes from the already created mapping object. Choose Save.
Choose OK.
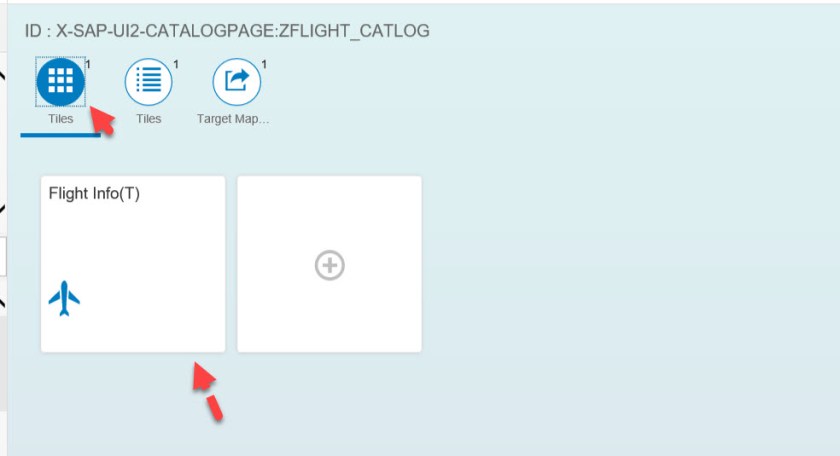
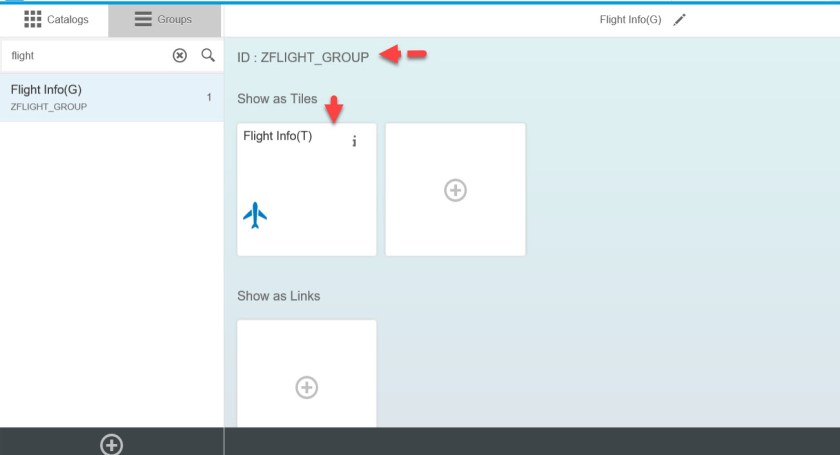
Now we have a tile.
Choose the first tile icon. So the Tile is displayed as below.
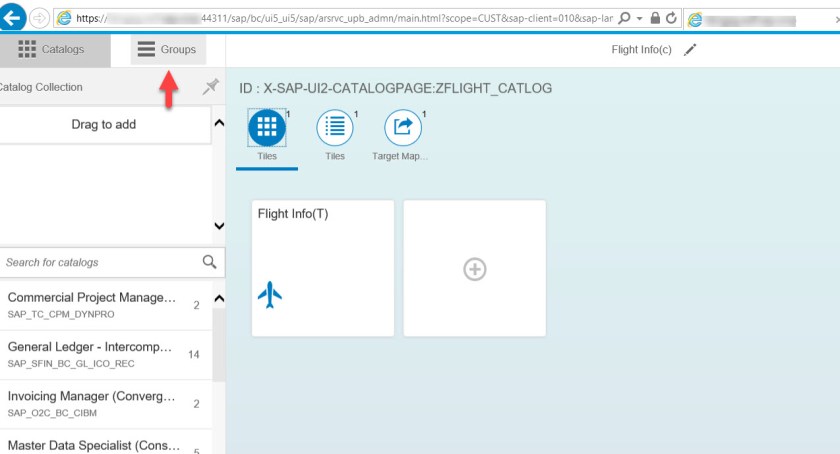
Up to now we create a catalog with target mapping and a tile that uses the mapping.
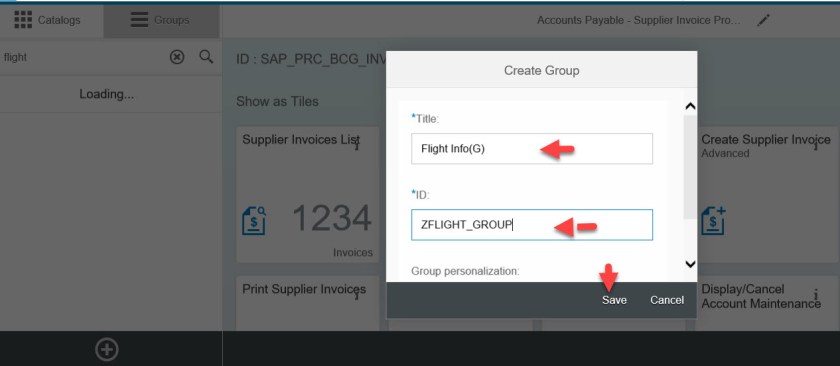
Lets create a group. Choose Group from the left top side panel.
Choose “+” button.
provide group title and ID. Save it.
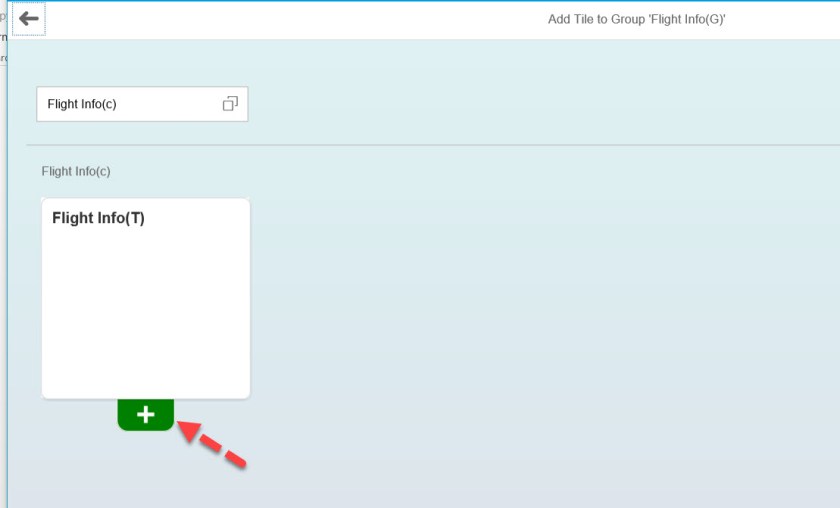
The below screen appears. Clcik on the + icon.
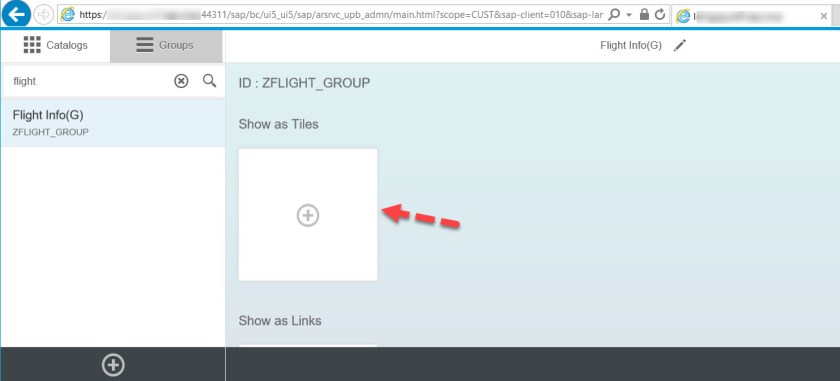
In the group, it shows the title from our catalog. Choose the tile (+).
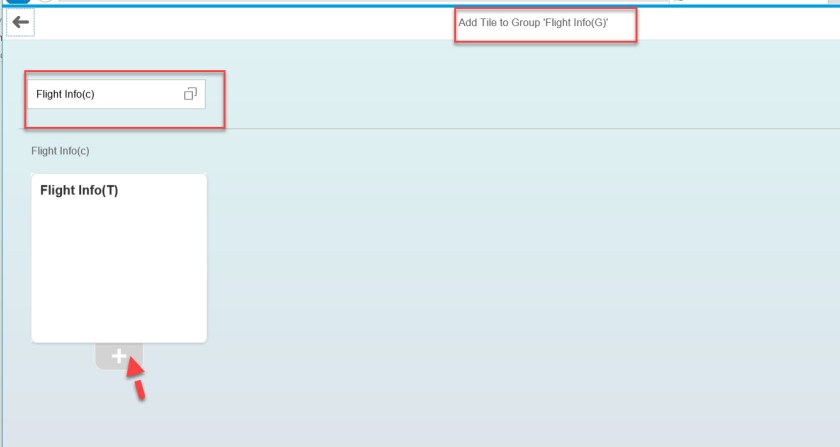
It turns into green.
Go back.
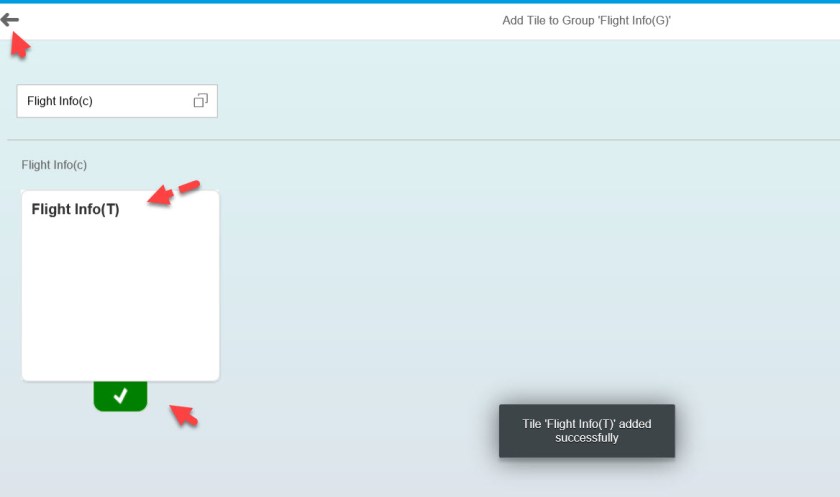
Now the tile is added to the group.
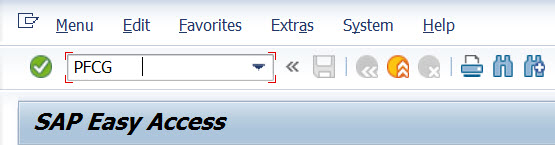
Go to Tx- PFCG
Create a single role.
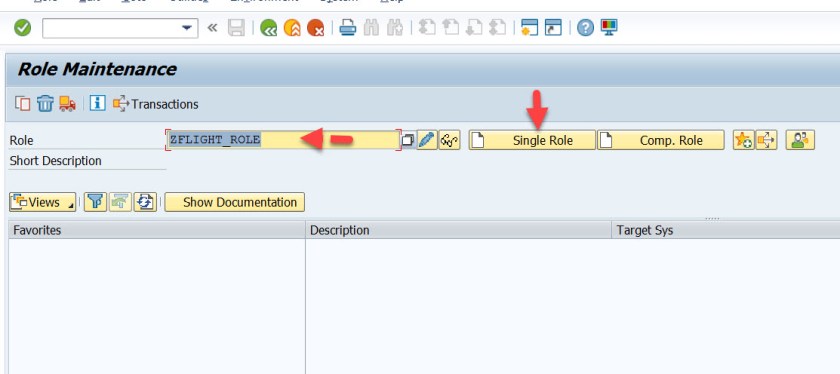
Provide the description and save it.
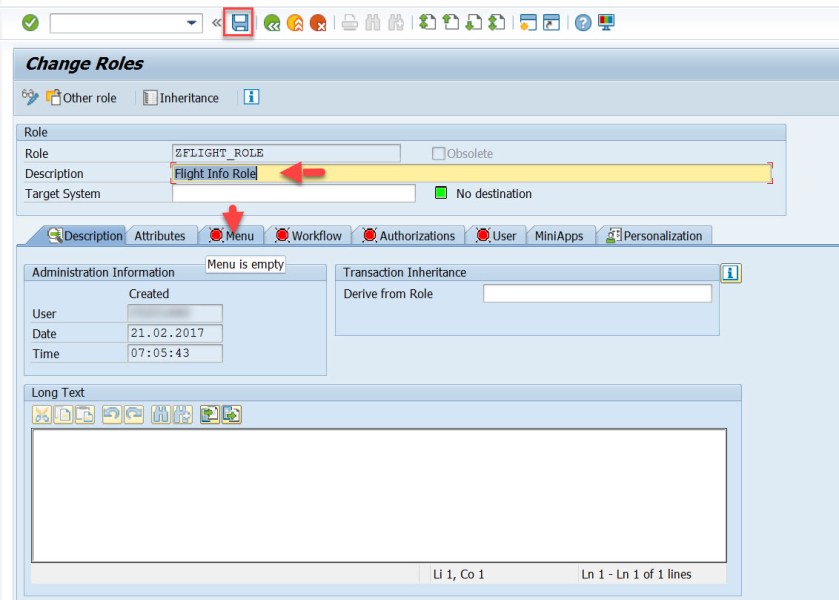
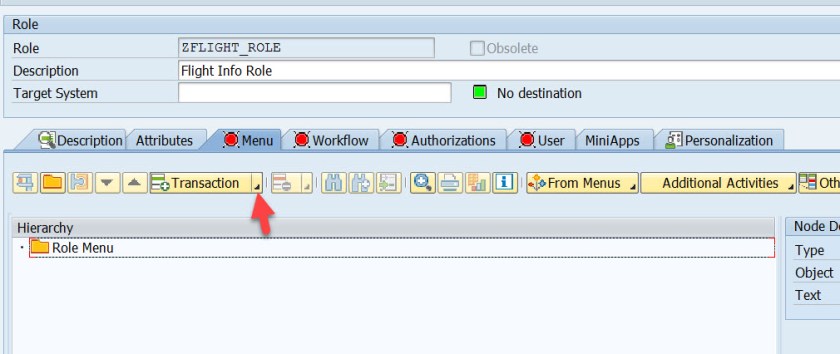
Go to the tab : Menu. From Transaction list button.
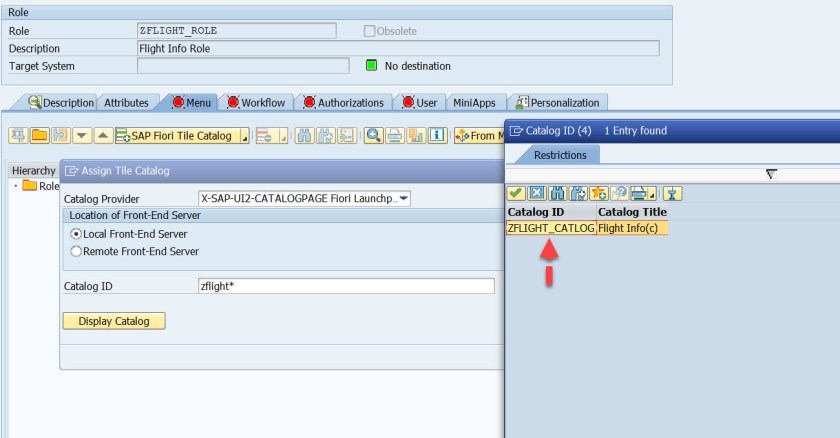
Choose SAP Fiori Tile Catalog.
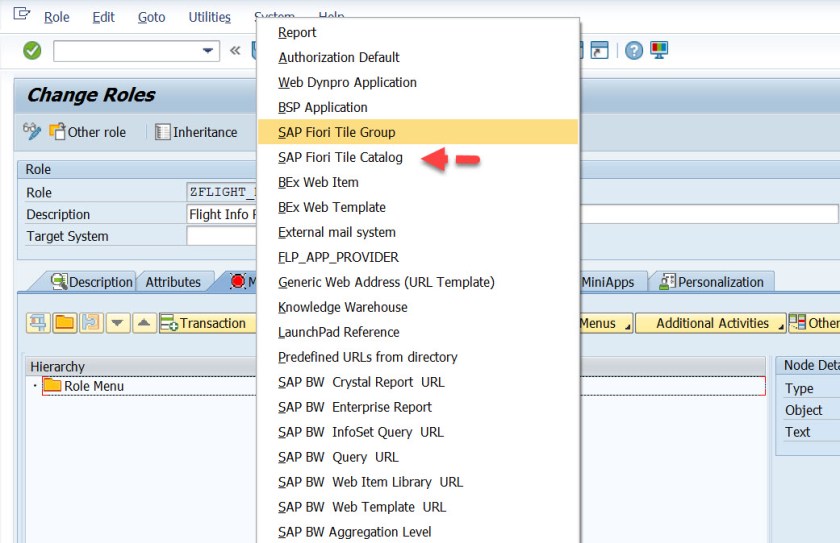
Choose the catalog name that we created in the Fiori launchpad configuration.
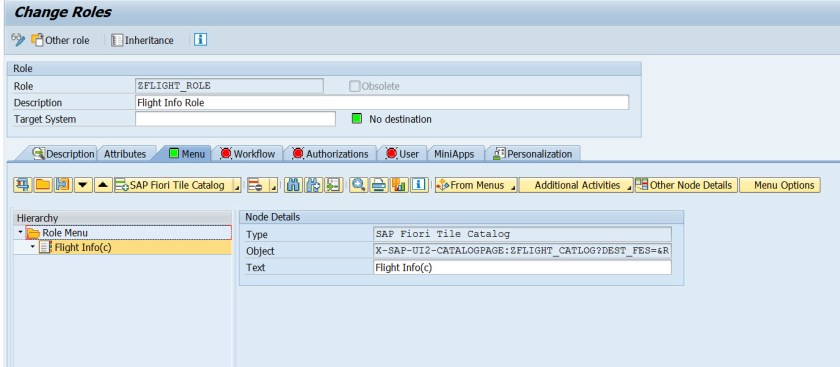
Continue.

The fiori catalog is added to the role menu.
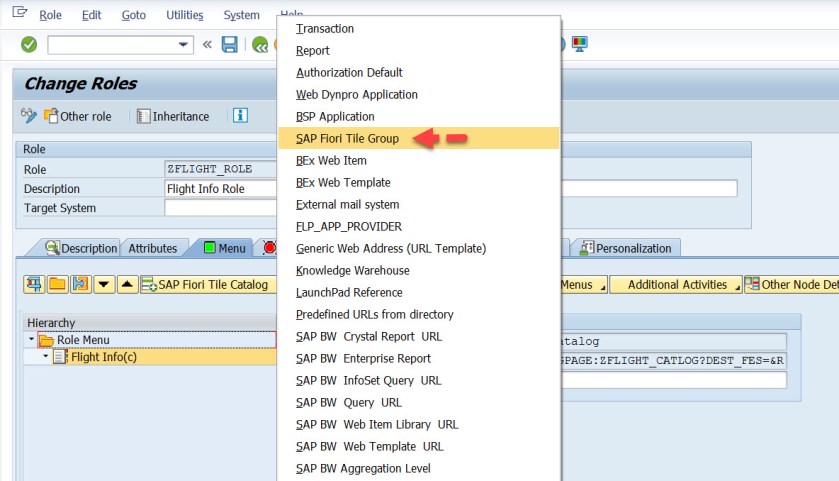
Now choose SAP Fiori Tile Group.
Choose the Group.
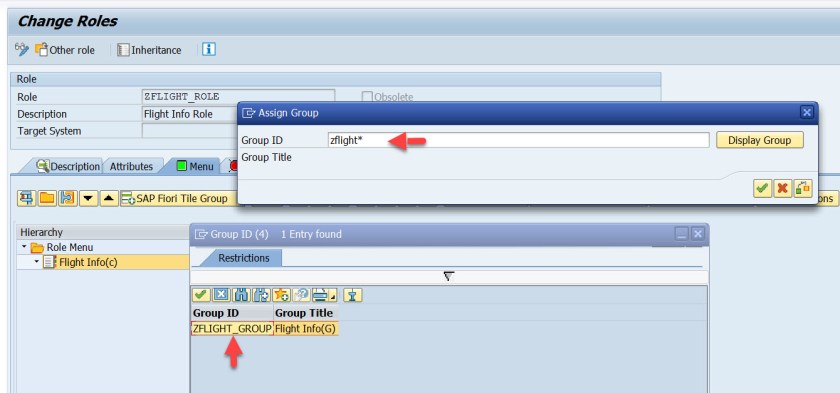
Continue.
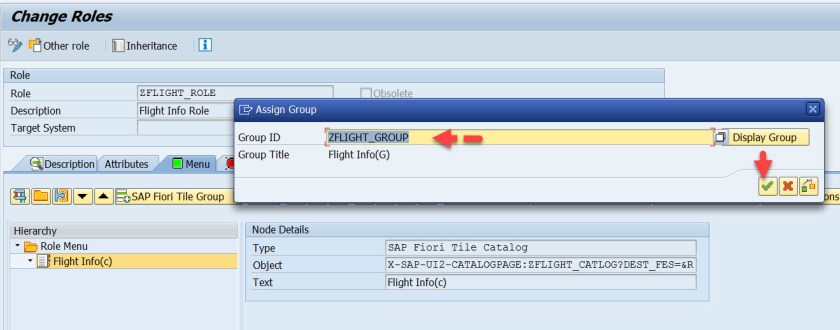
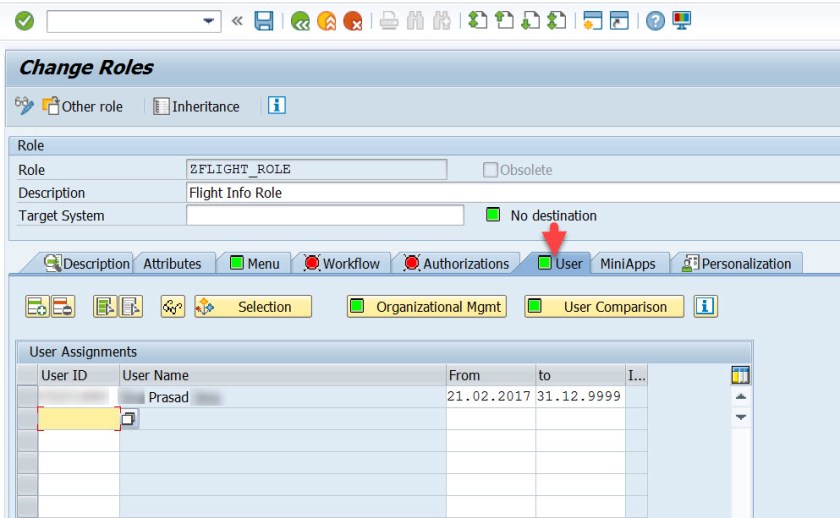
Save. Go to the USER tab.

Add the user to whom you want to assign the role.
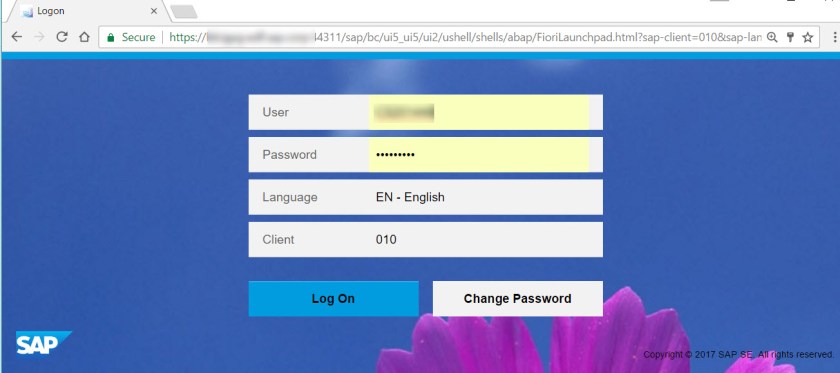
Now open the Fiori lauchpad- tx- 
Login.
Wow. You have custom fiori app tile. Click on the tile.
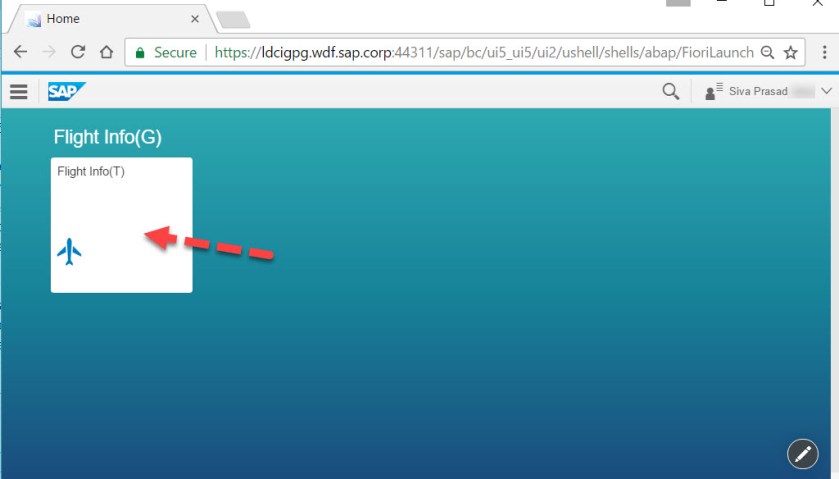
It launches the BSP application that shows the table with few rows.

Hi Siva,
I really liked your post.
But I am facing an issue.
I get this error when I am trying to execute my BSP application in web browser. My table is empty.
Error – Failed to load resource: the server responded with a status of 404 (Not found)
It seems there is some issue with the Service URL that I am passing. I tried doing some changes. But it is not working.
Can you please help me with it.
Thanks and Regards
Meenakshi Raina
LikeLike
Hi Siva,
This post is very useful(UI5-Consuming oData service & building Fiori App), can you add some addtioinal function,for example:
selection screen/ a search button, or Delete/Modify button.
when entering a carrid value,click search button, the table will display data according to the user input value.
thanks a lot!
LikeLike
Great Post.. Keep doing it.
Thx.
LikeLike
Excellent work
LikeLike
Great Job
LikeLike
As far as I know, UI5 applications are no longer developed in Eclipse. 😦
LikeLike